
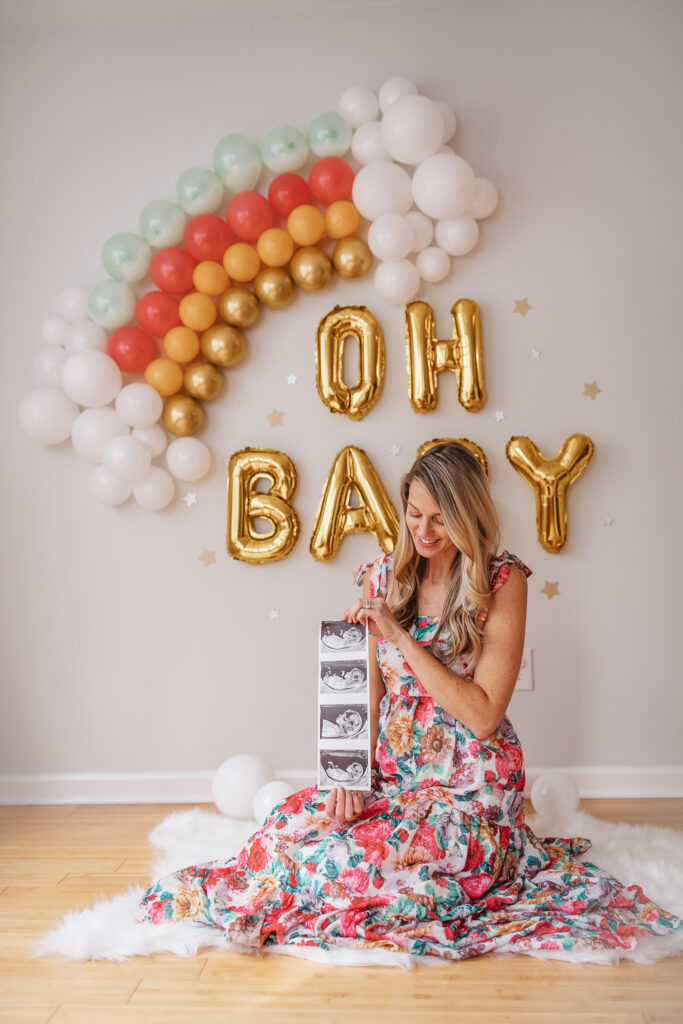
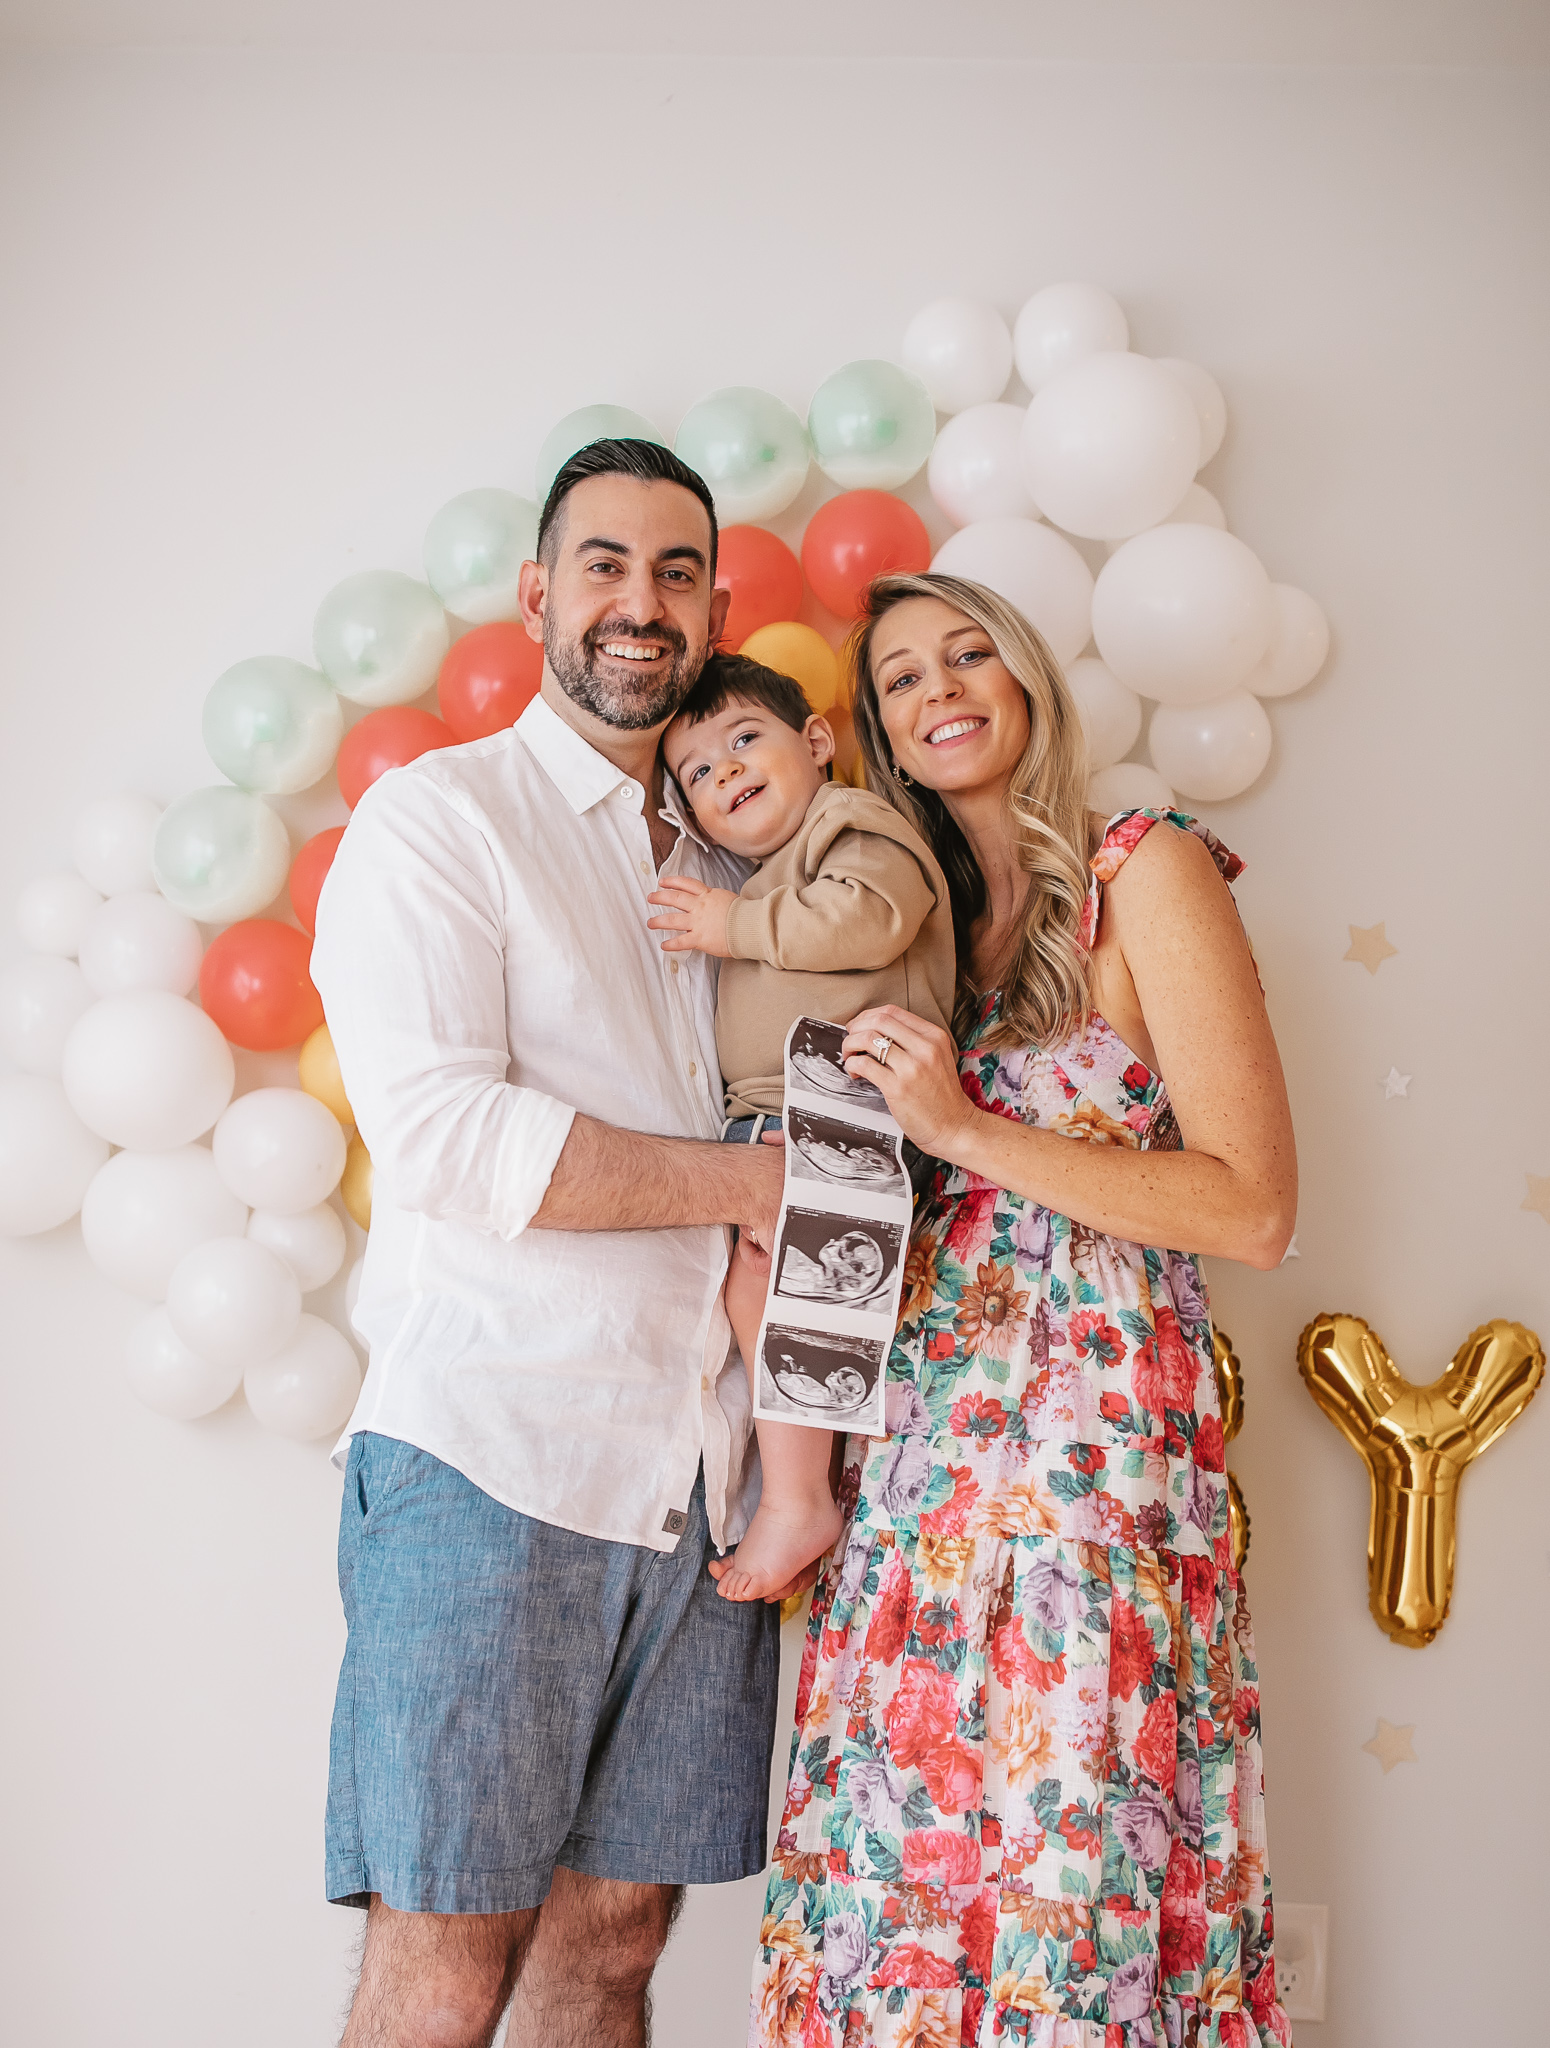
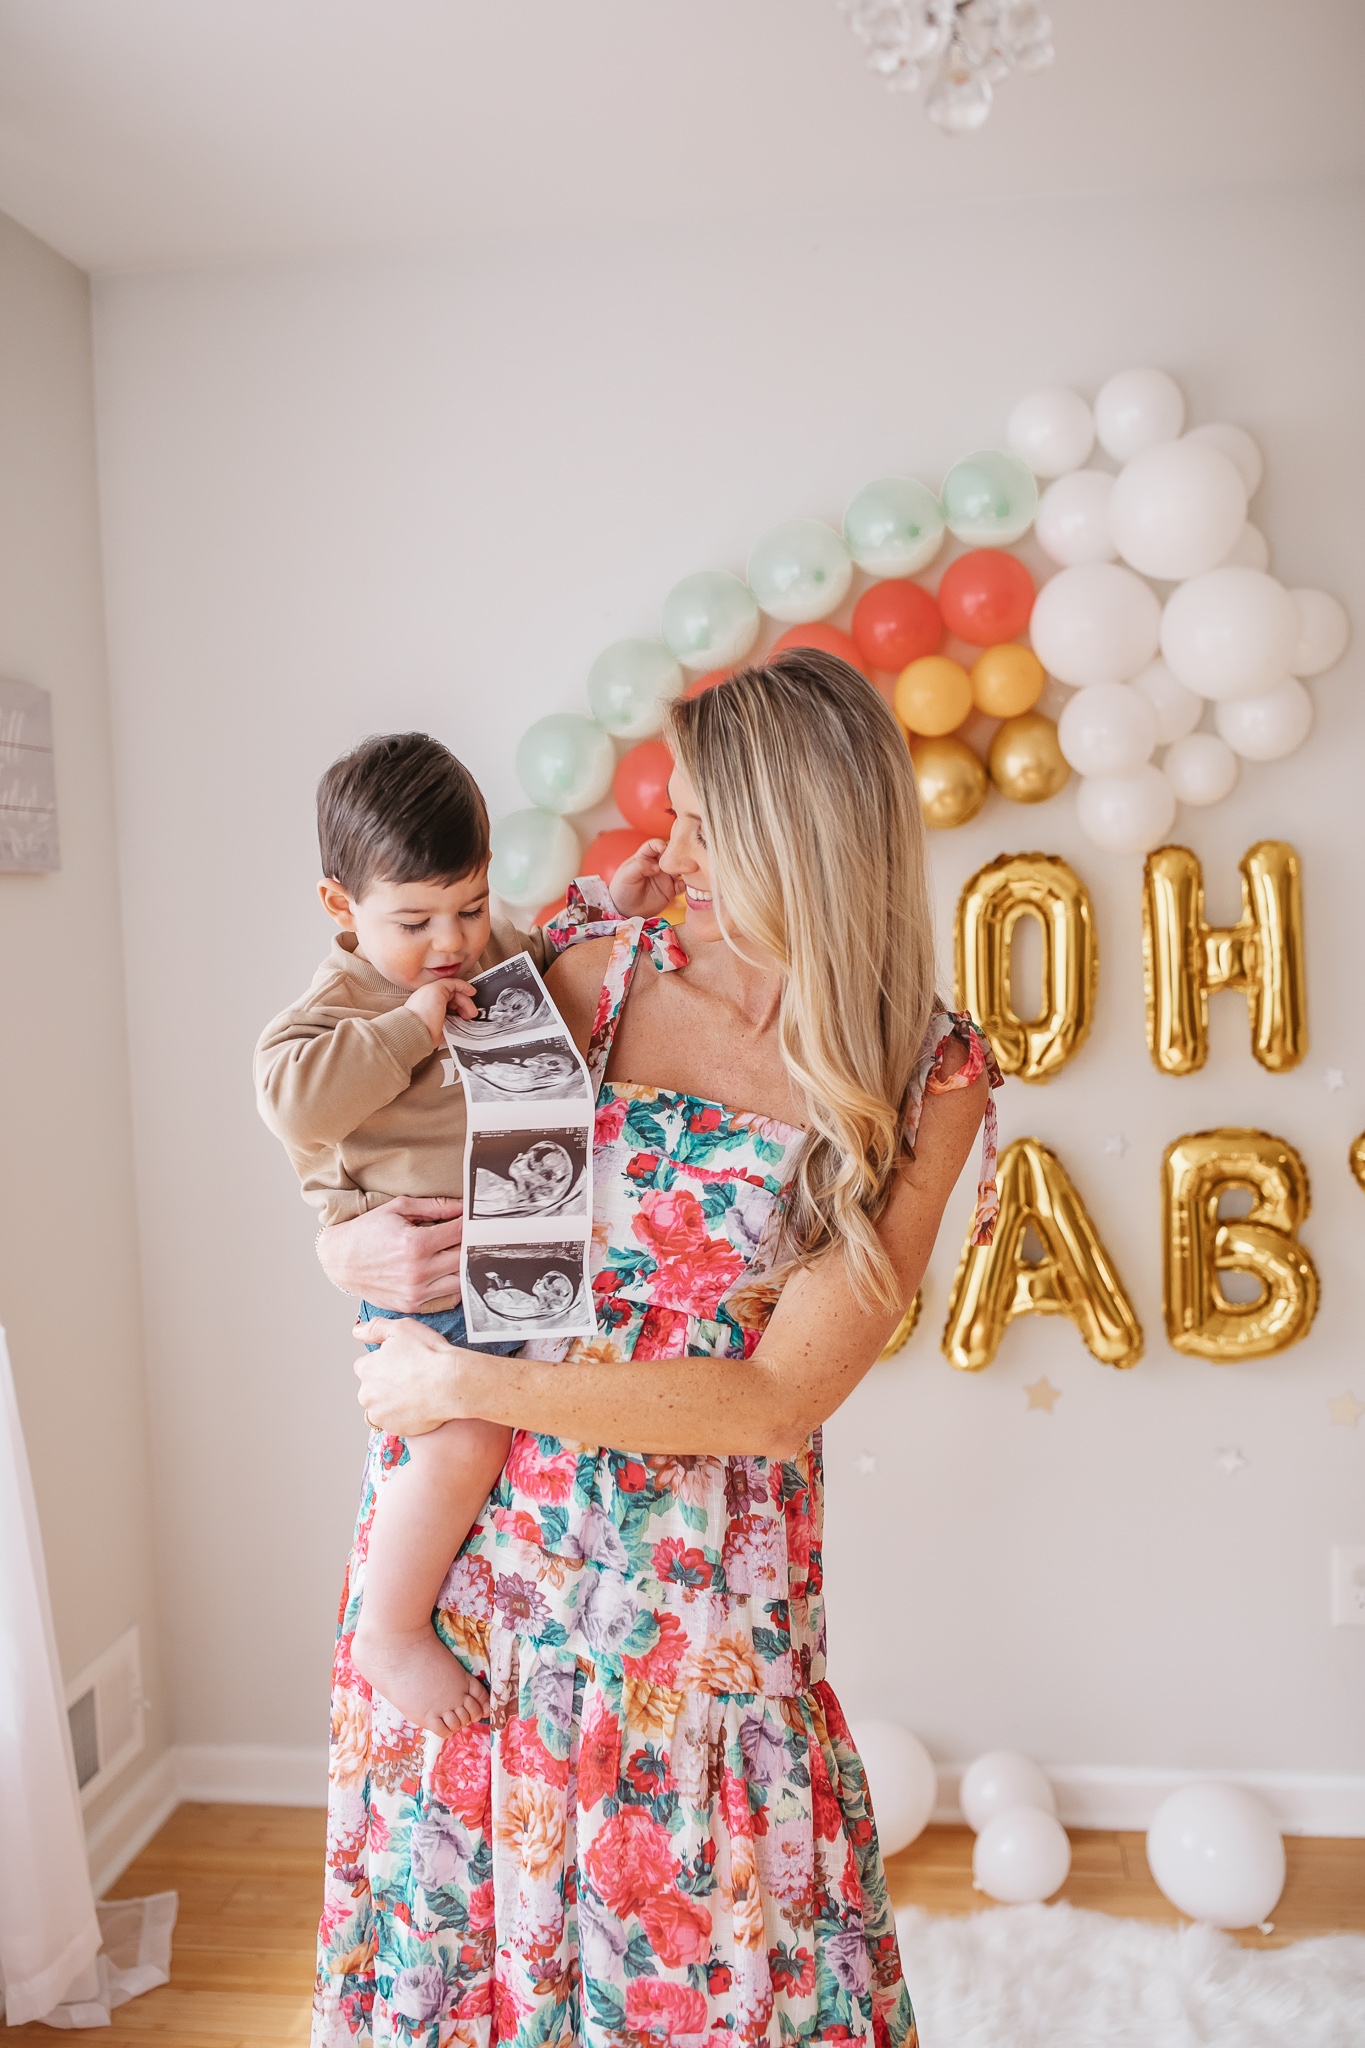
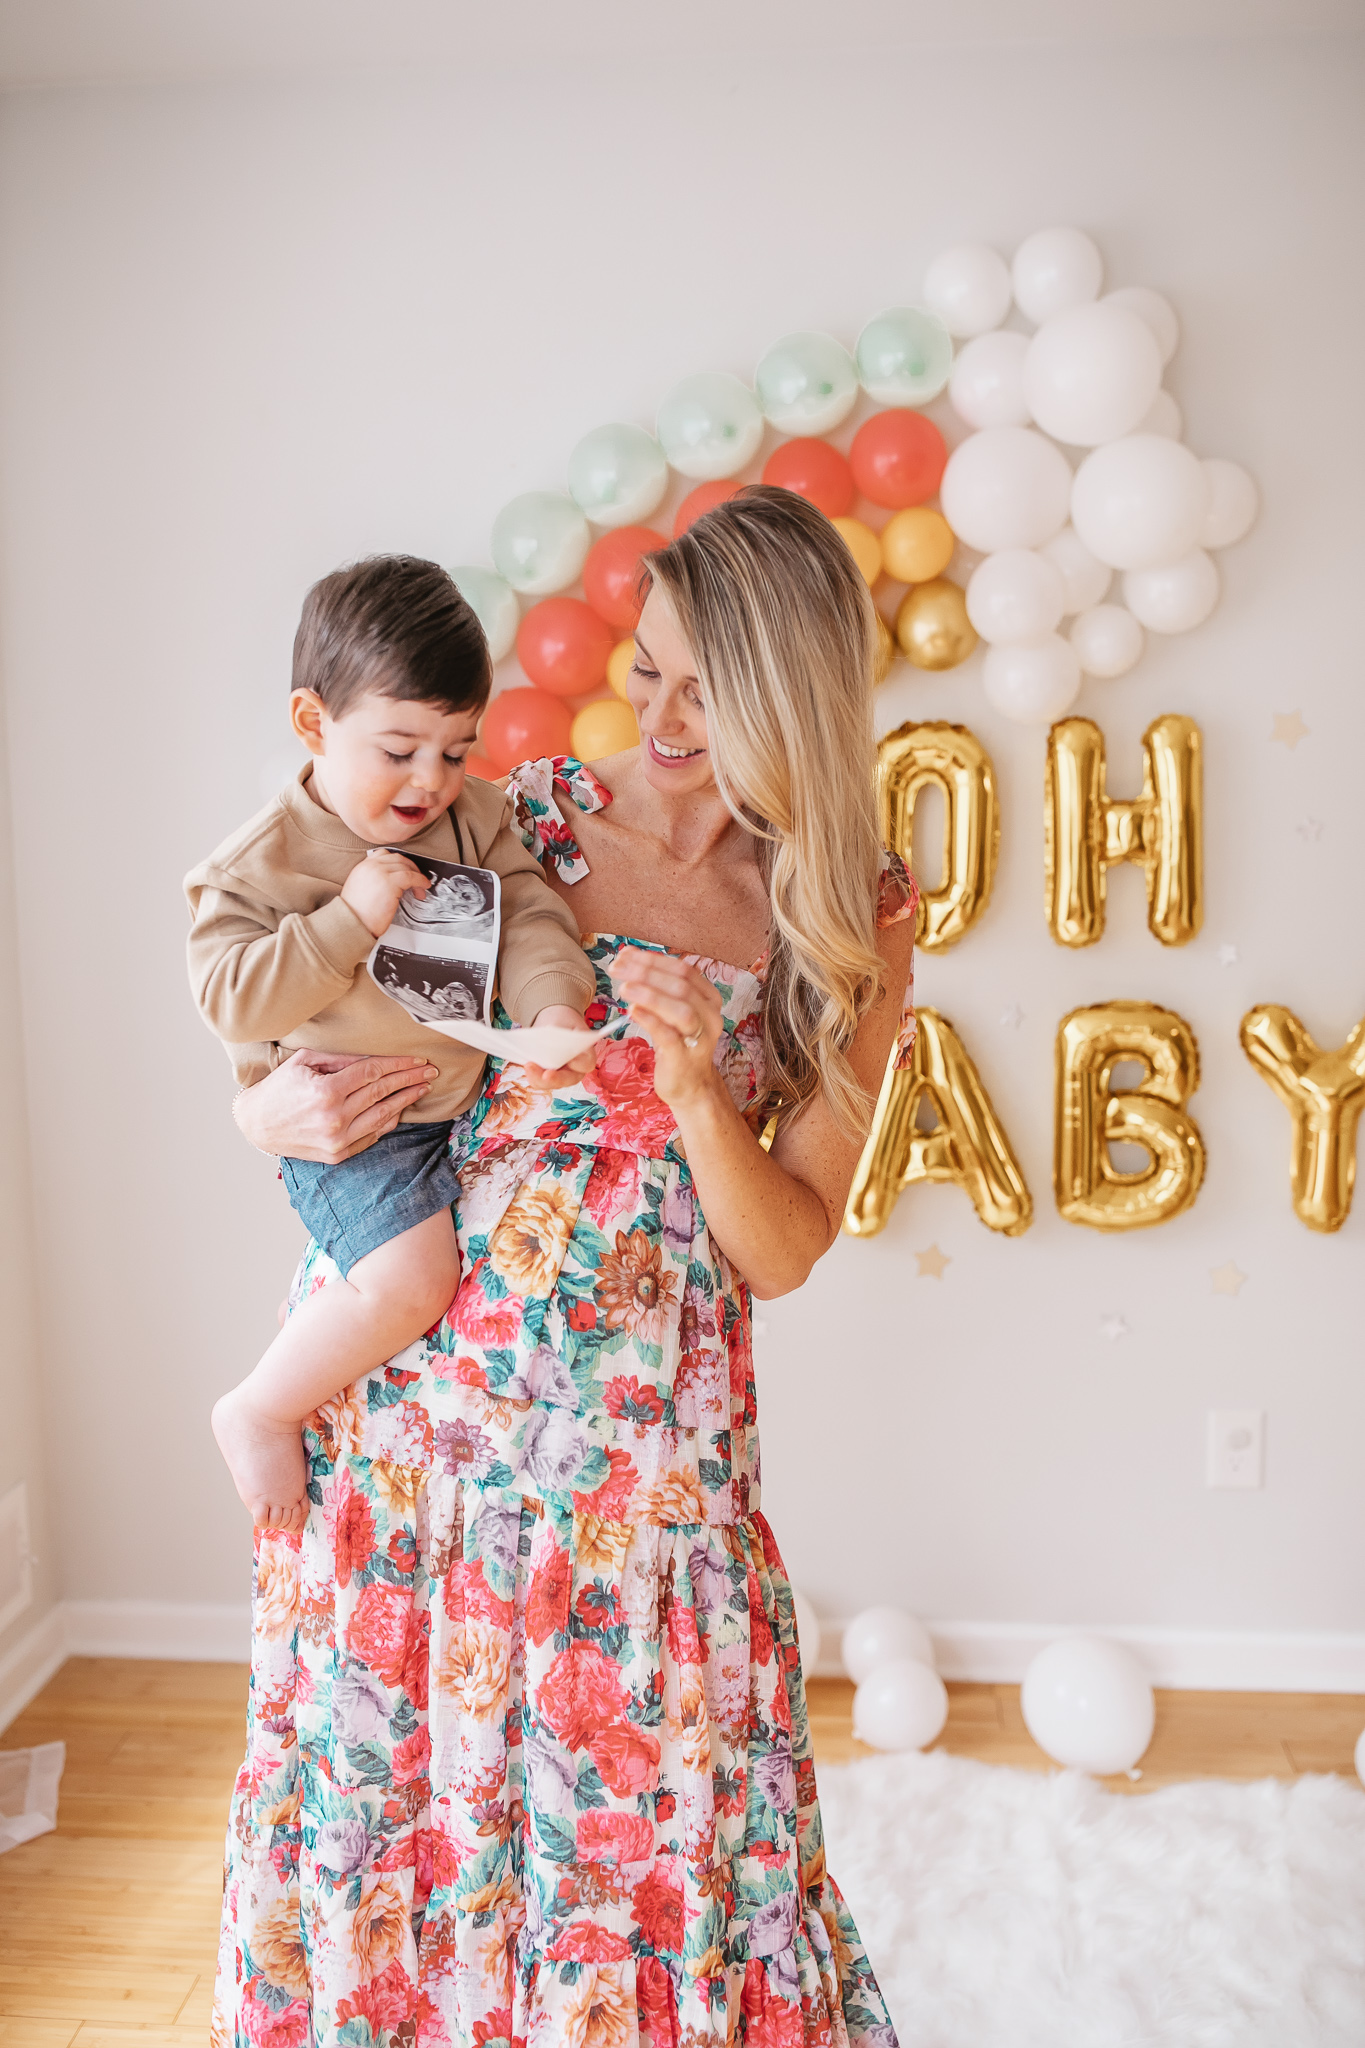
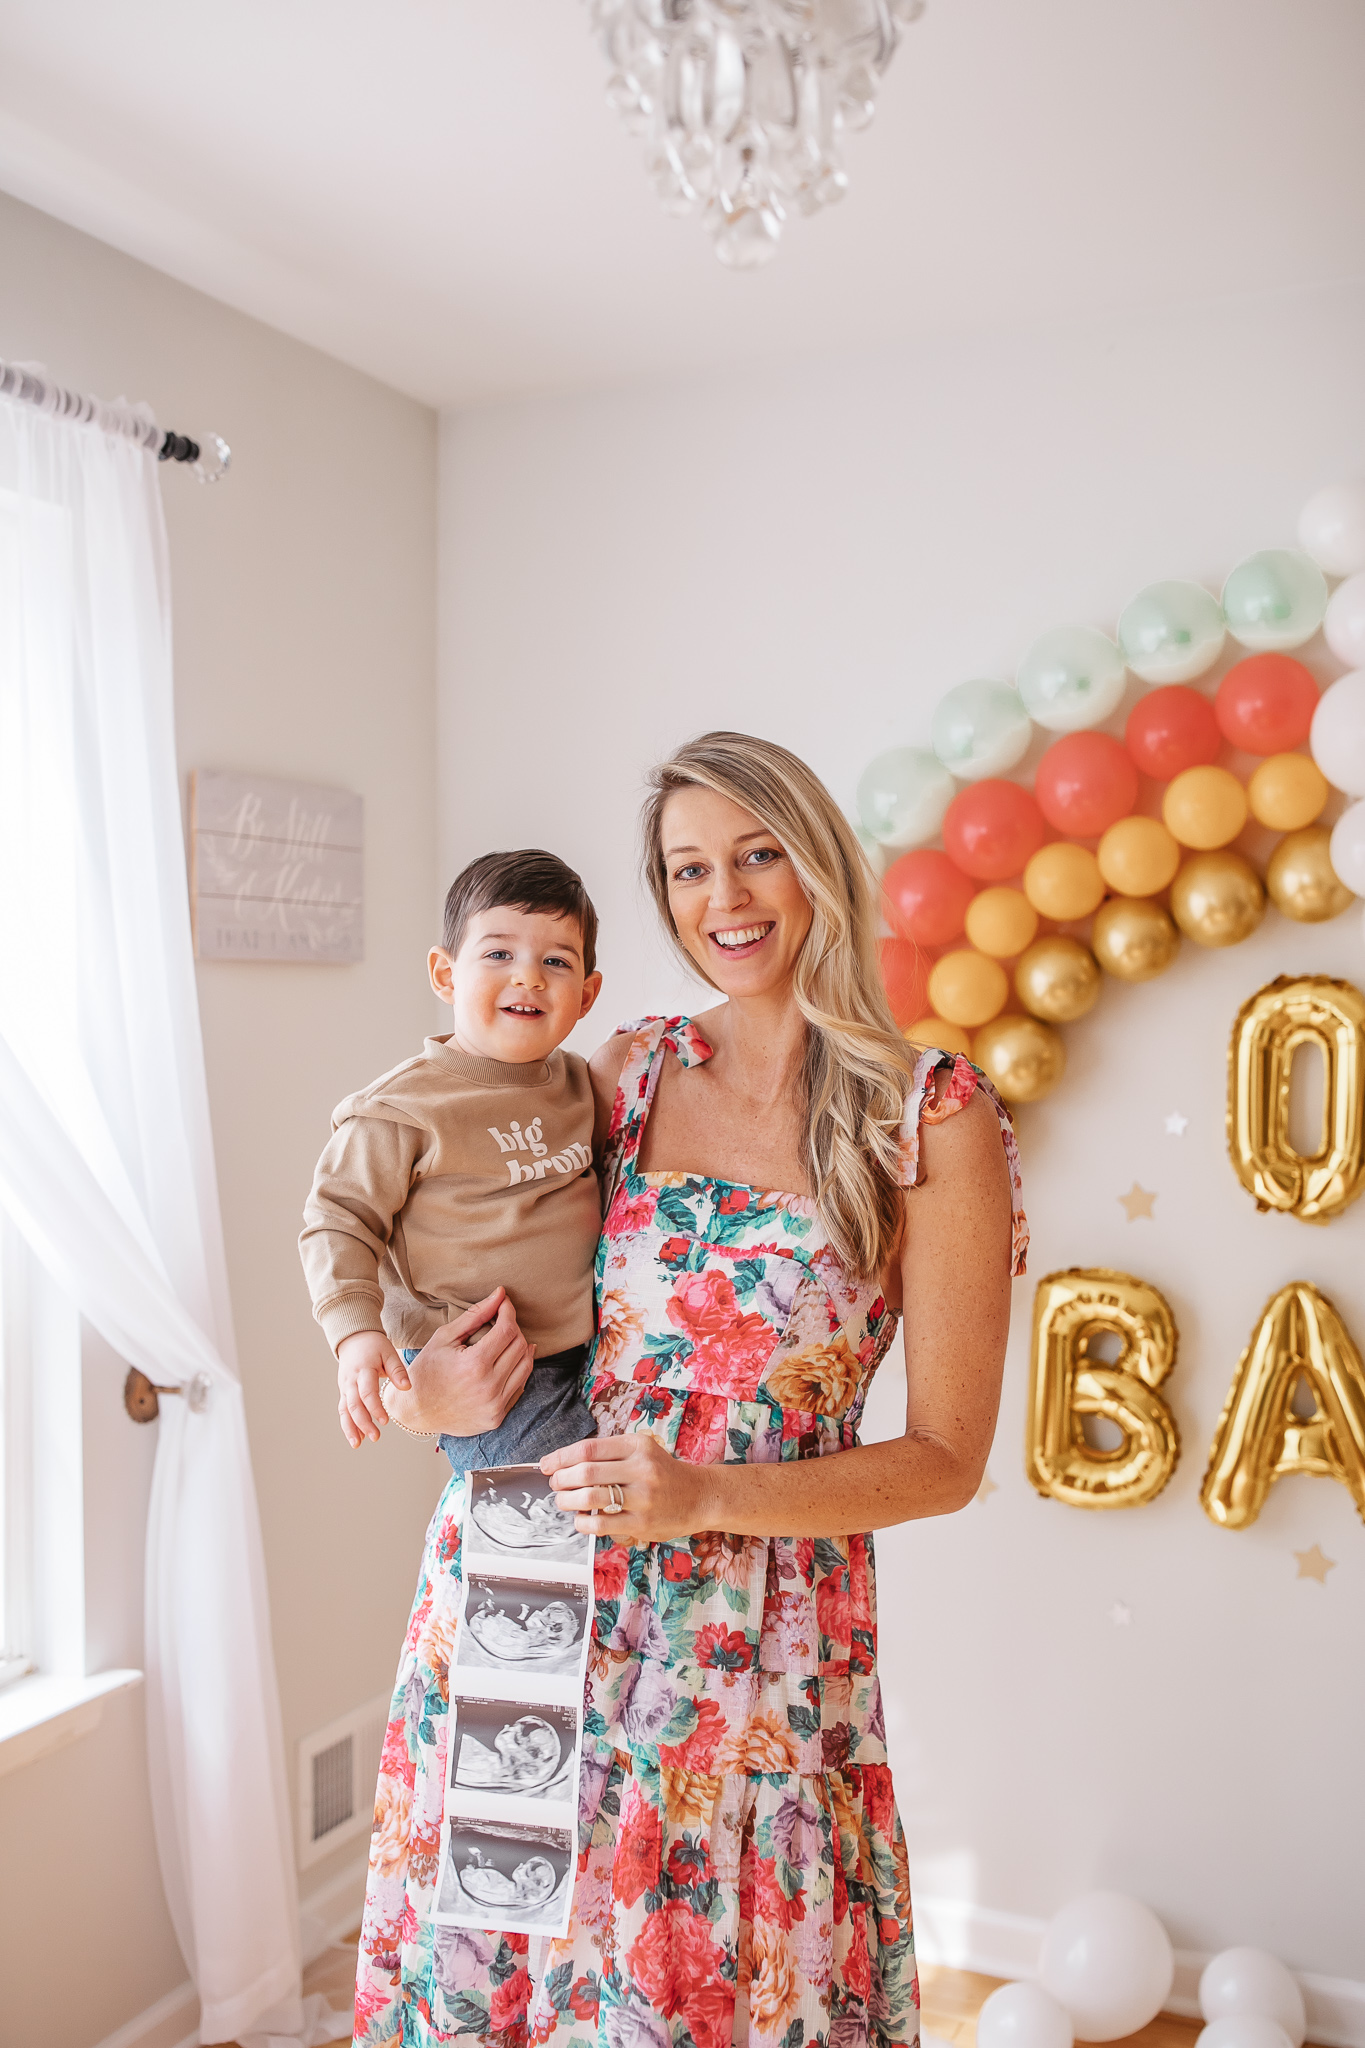
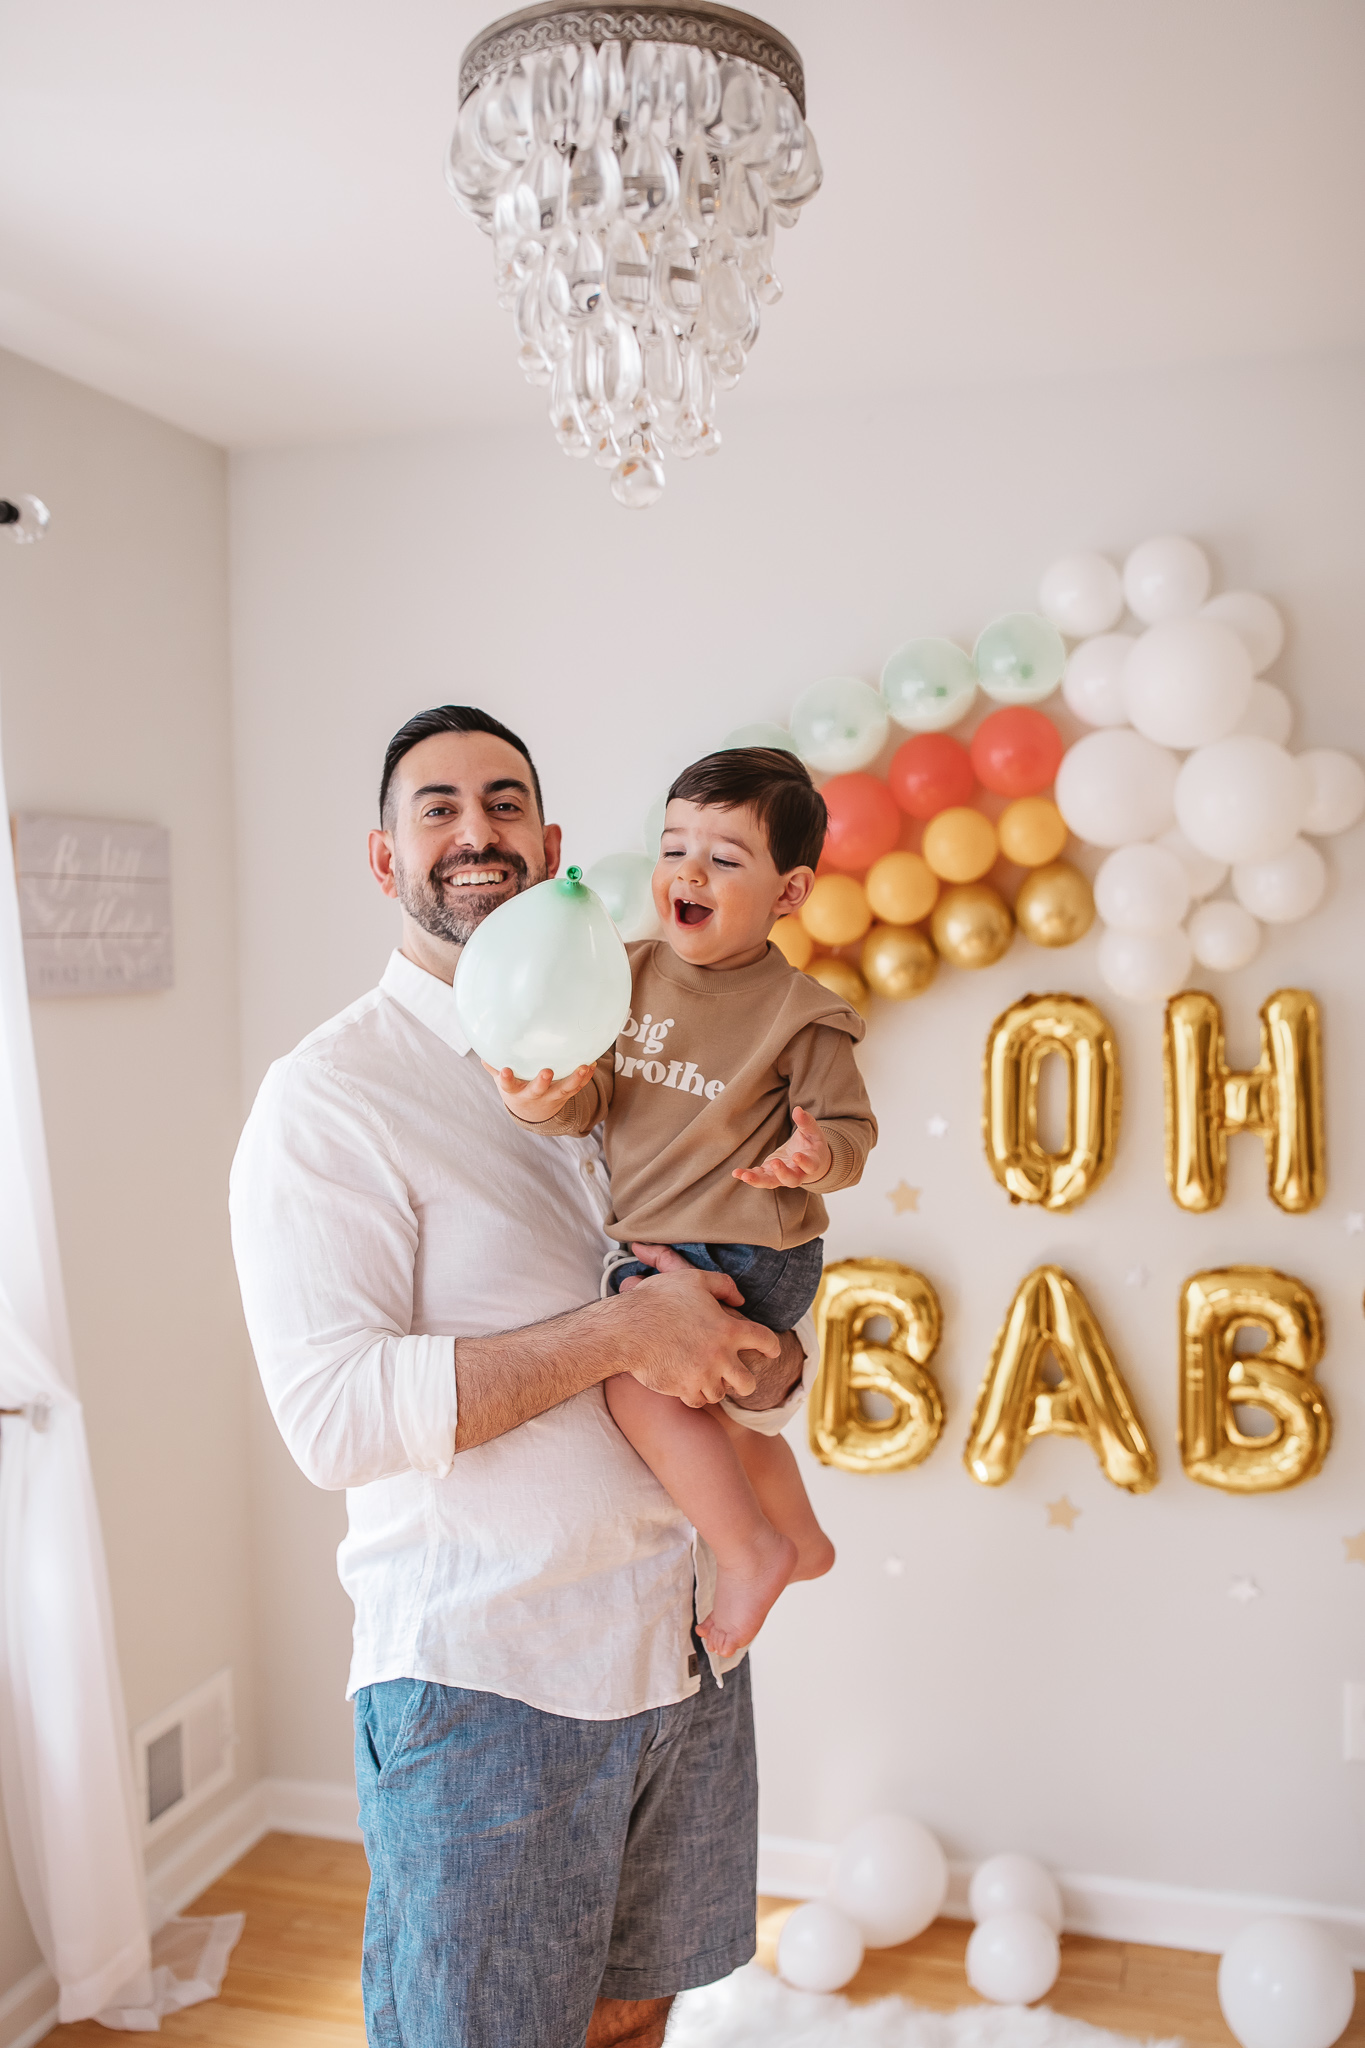
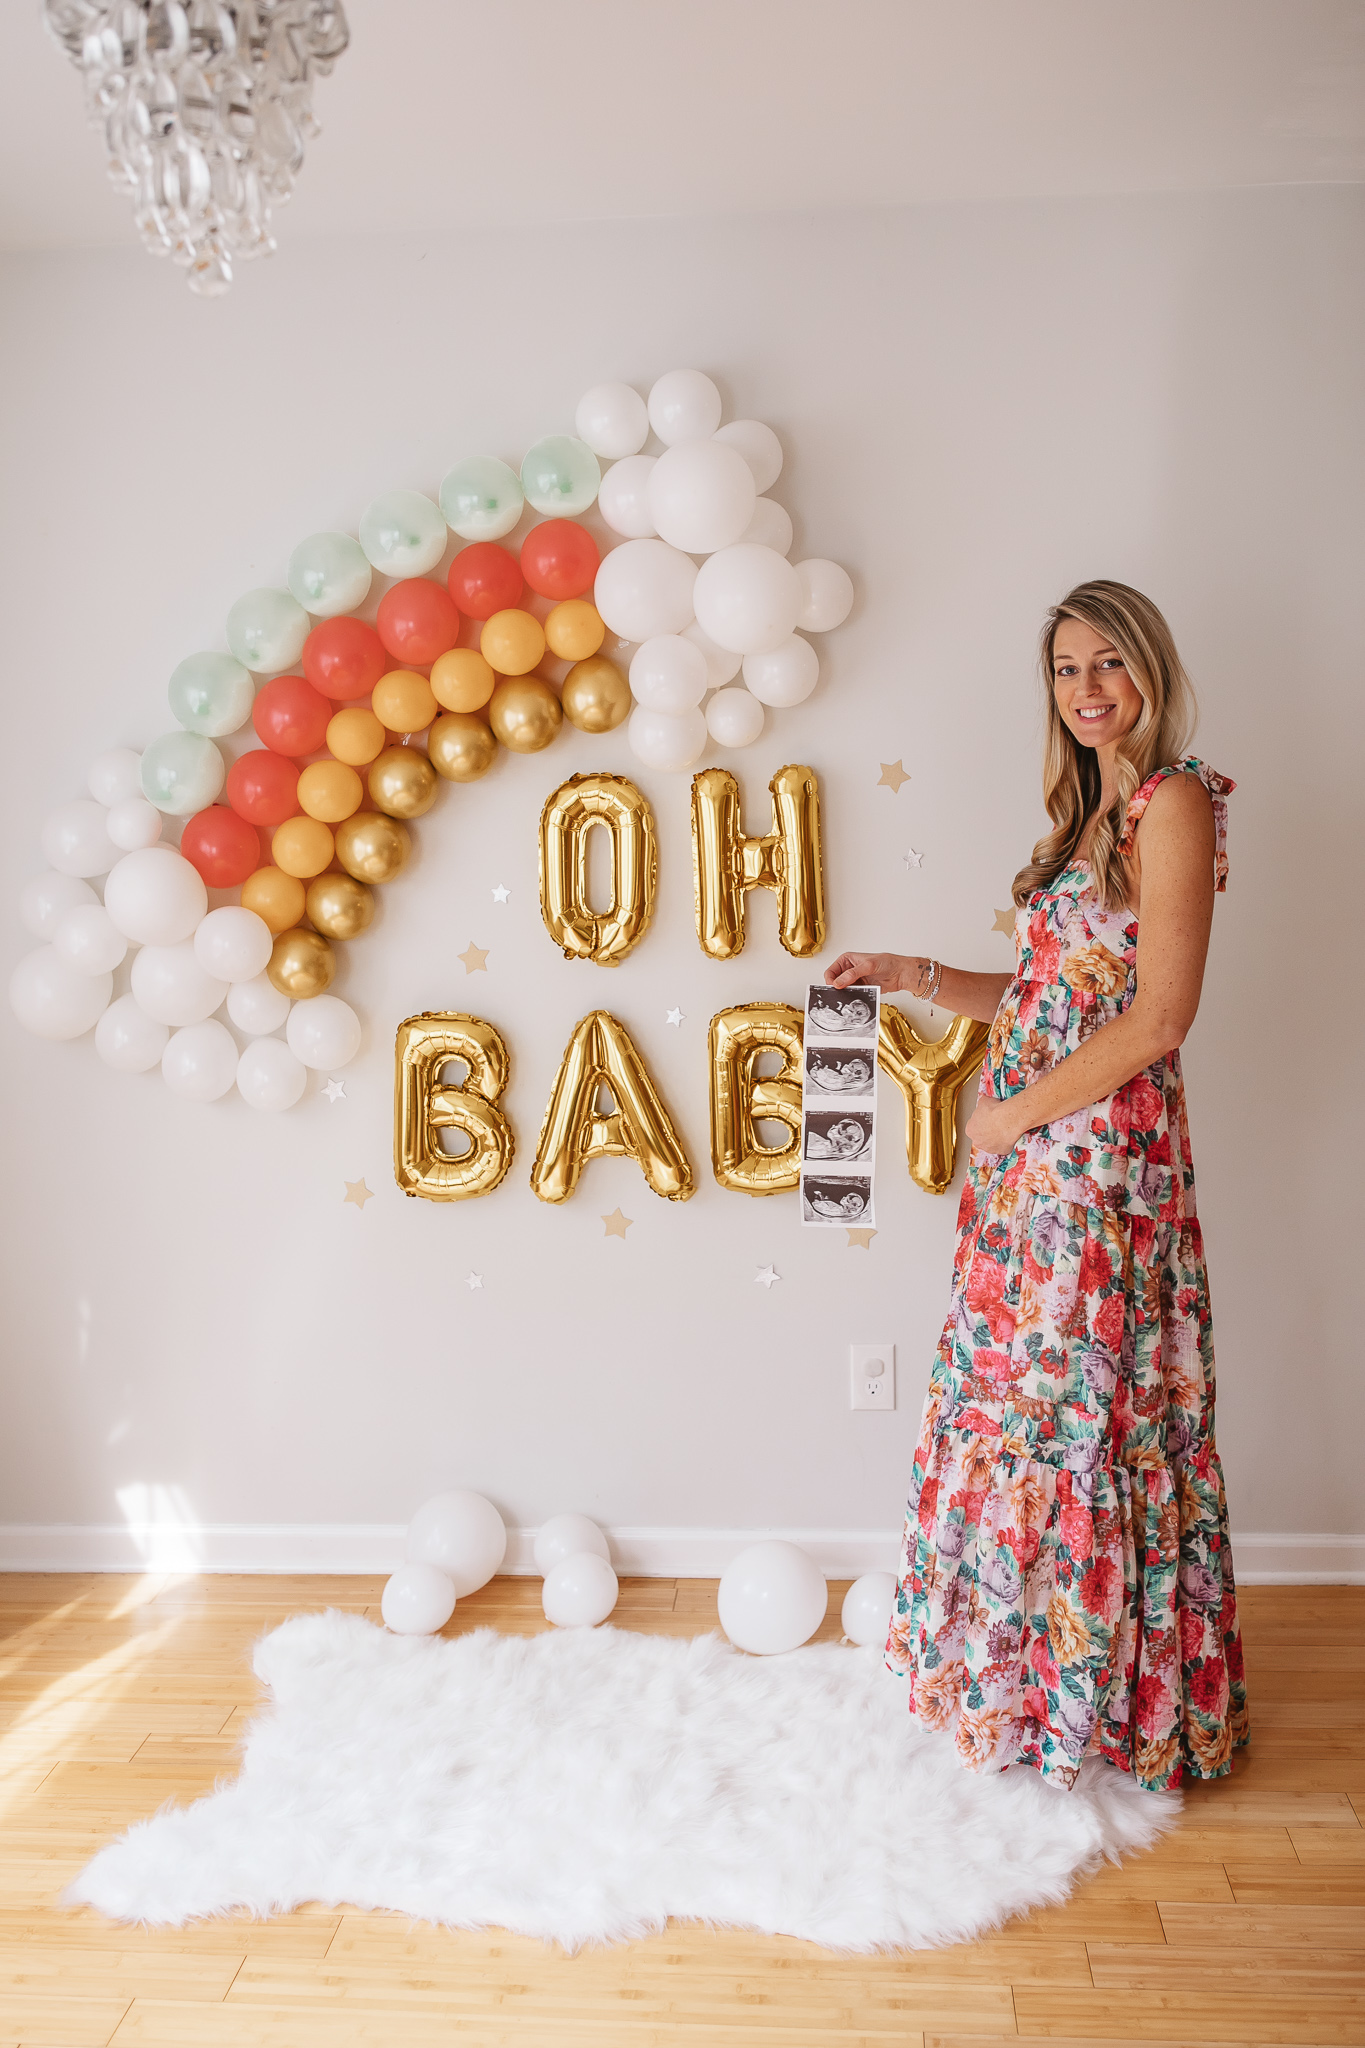
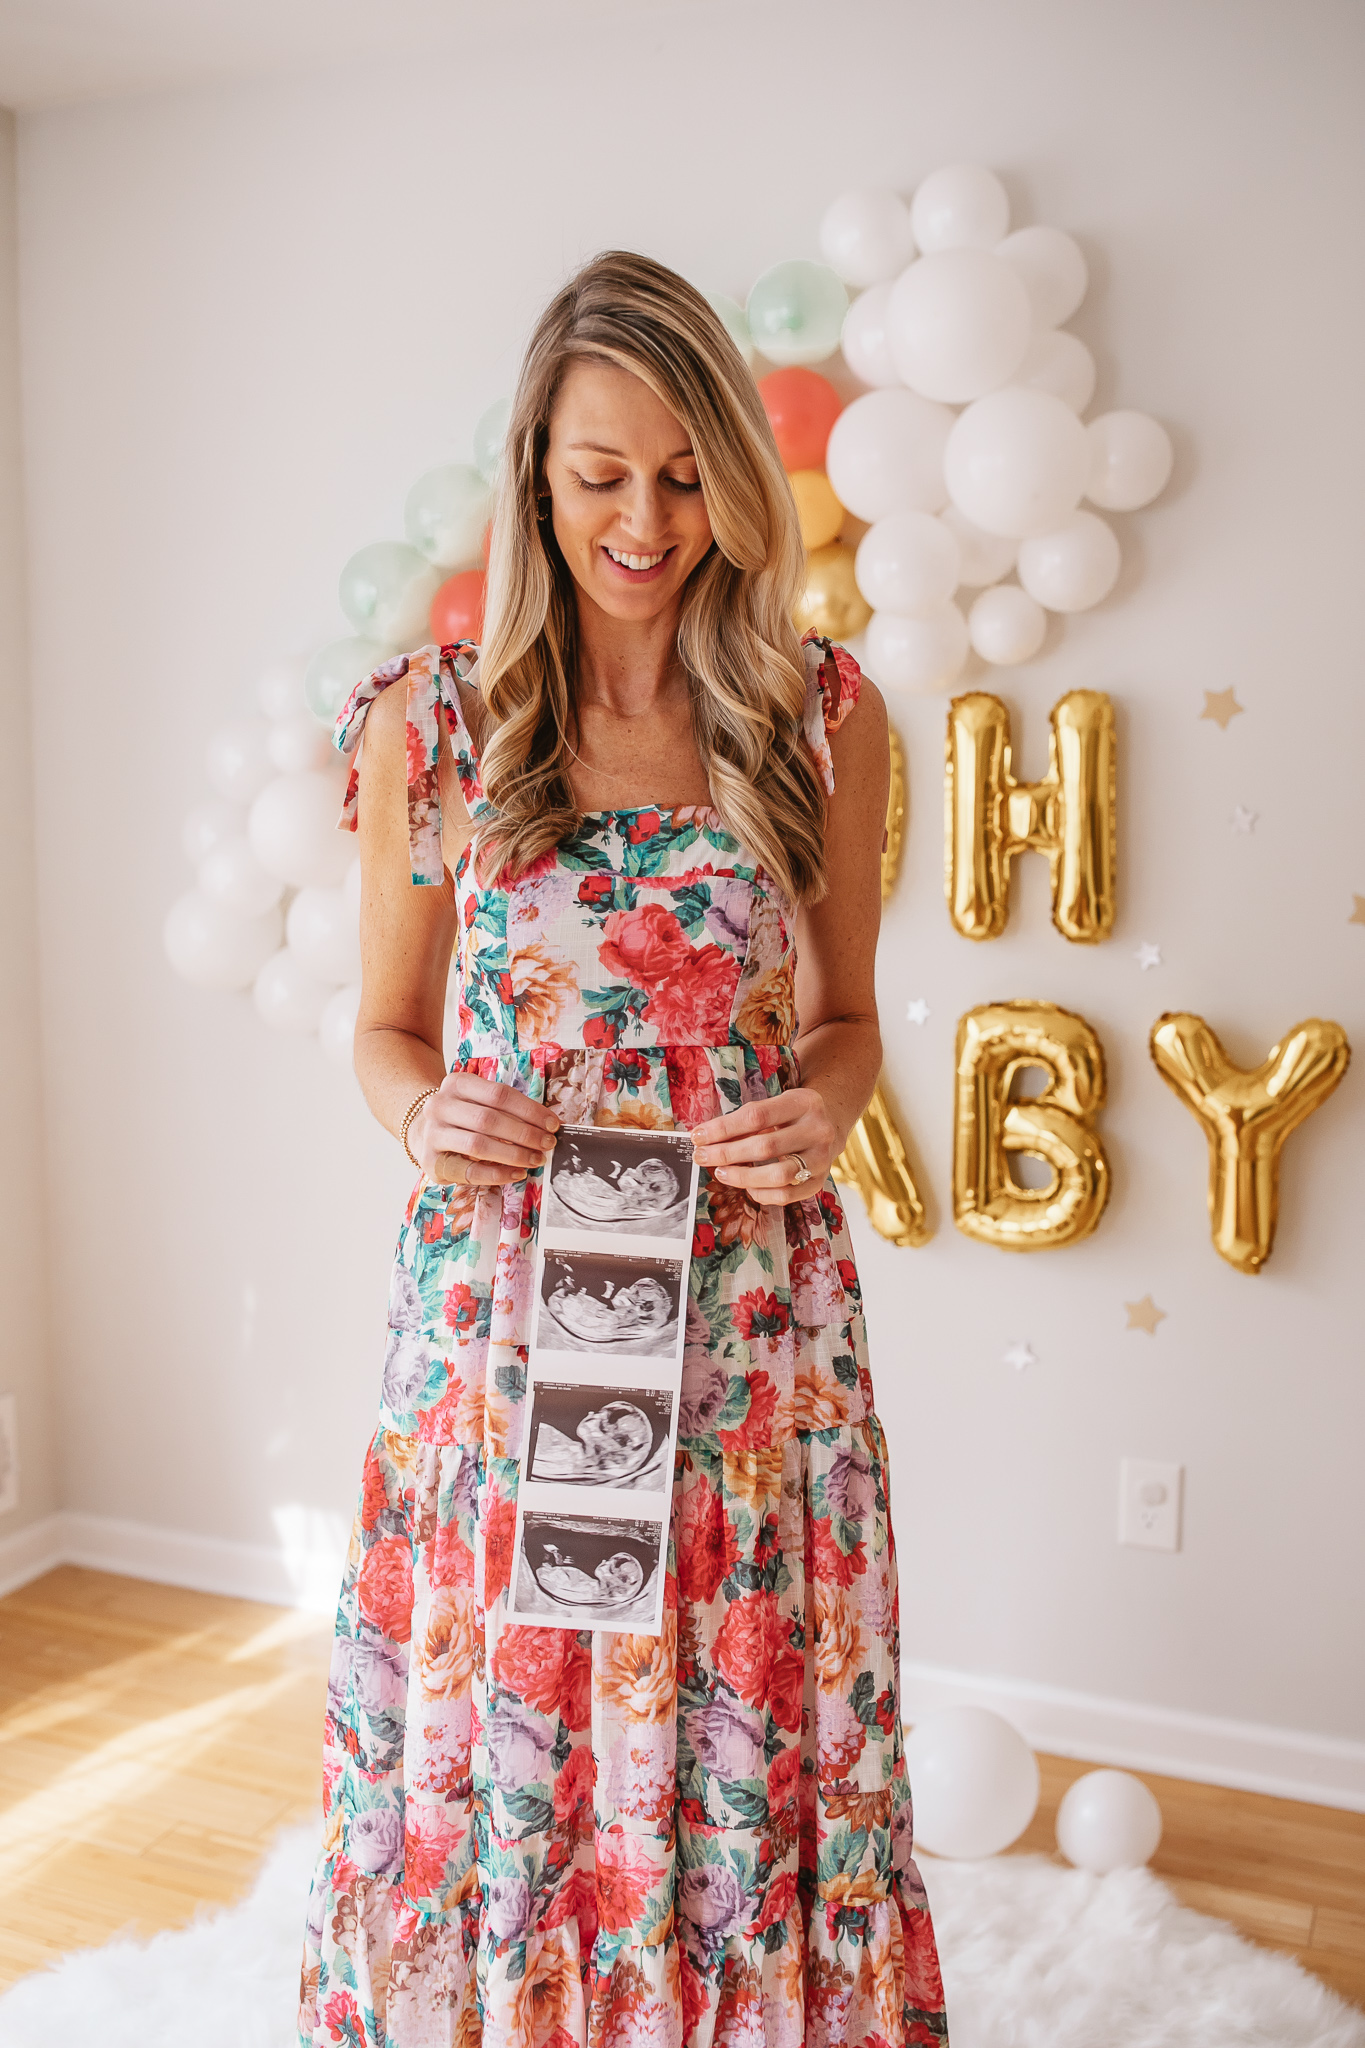
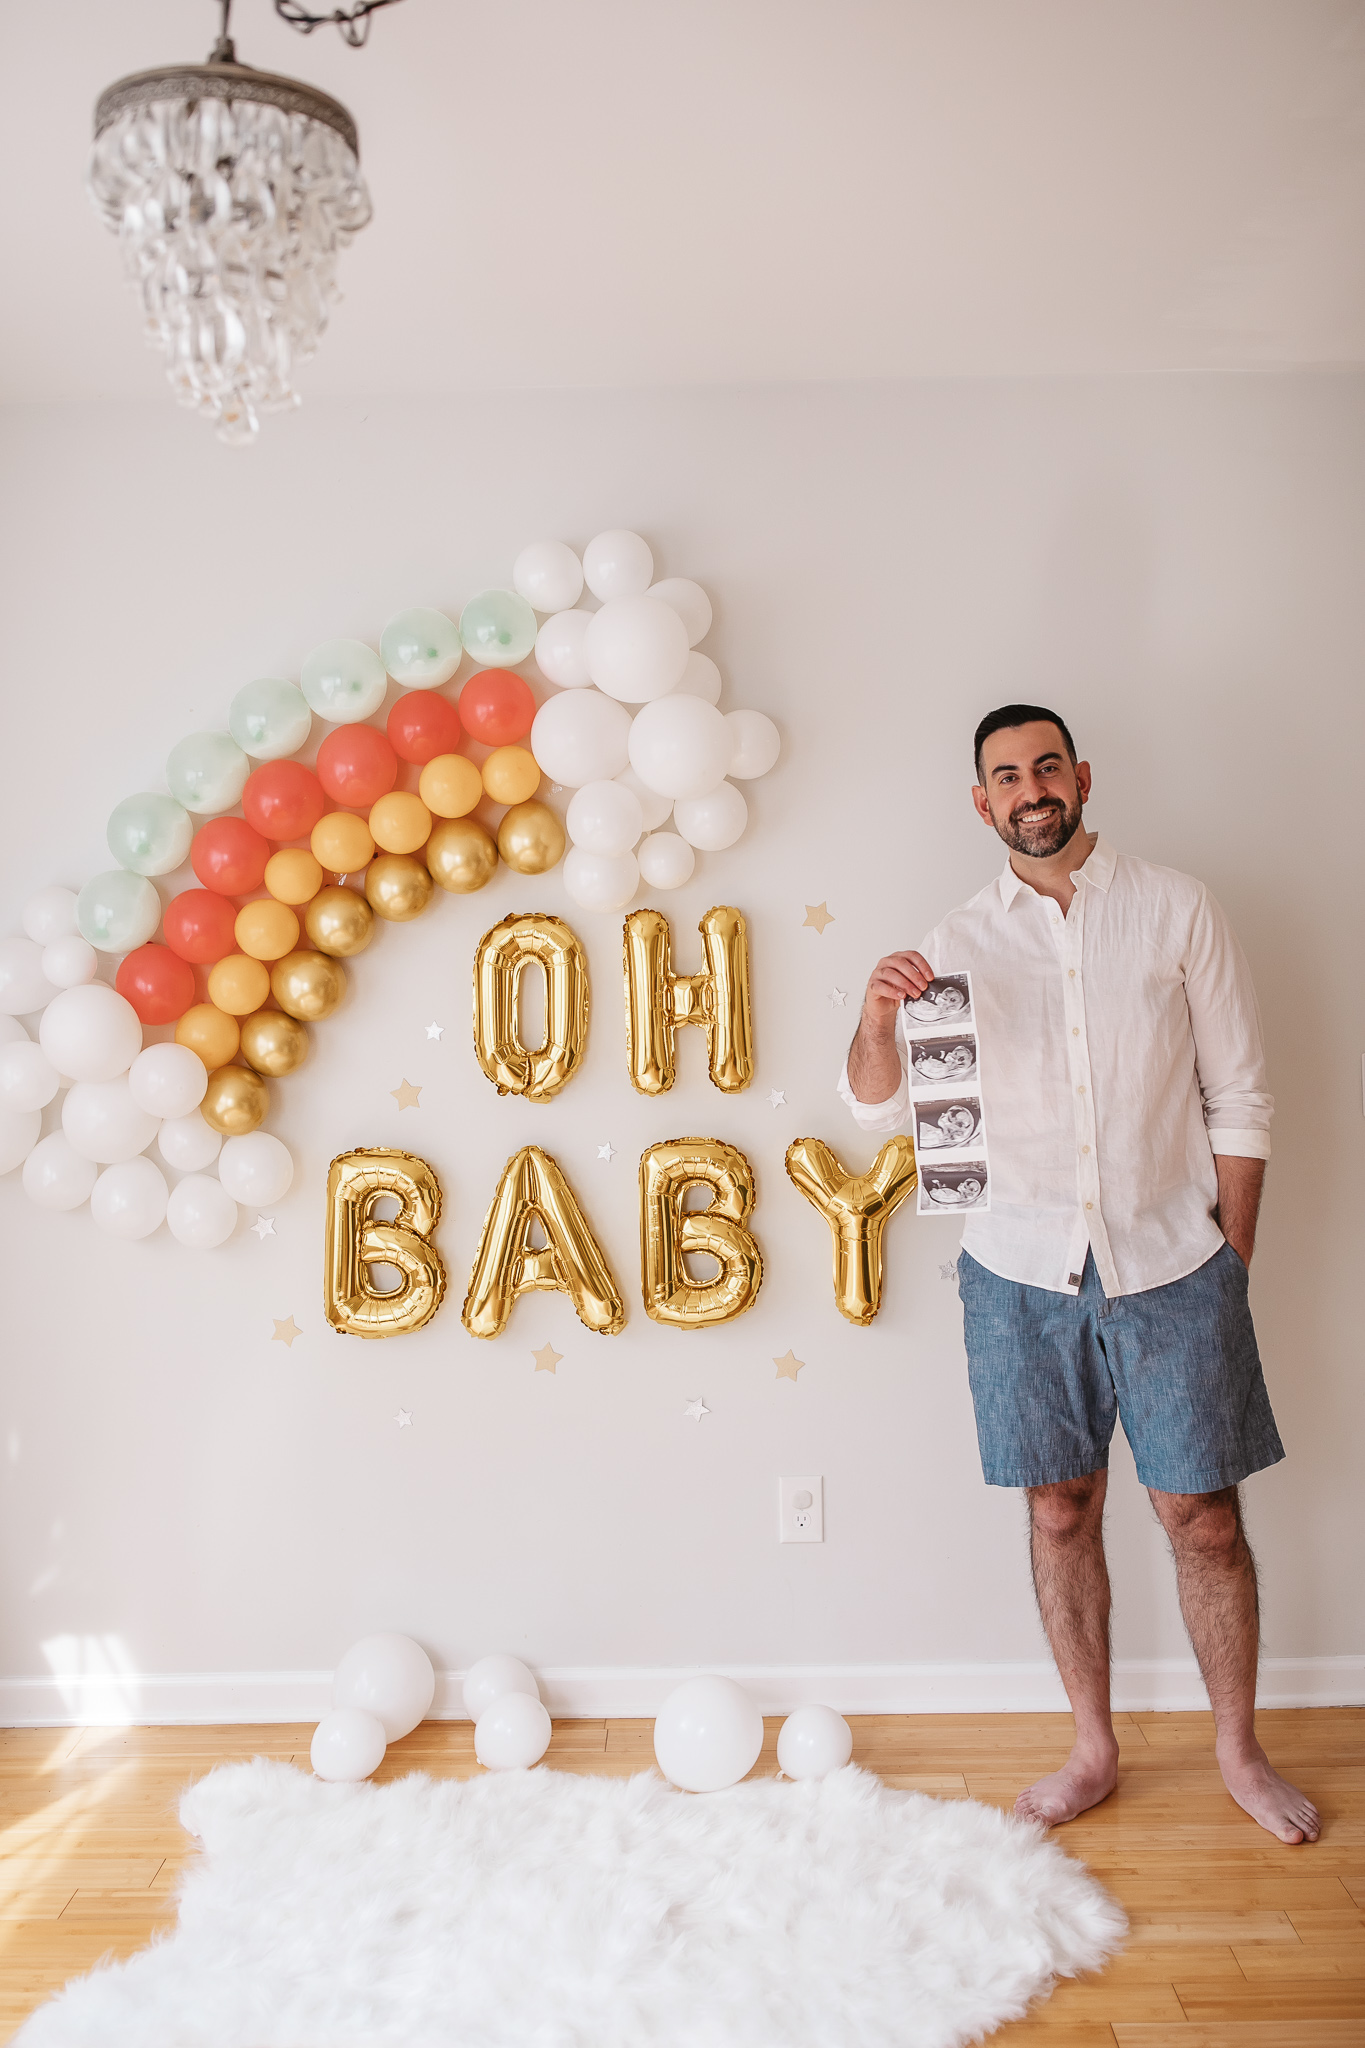
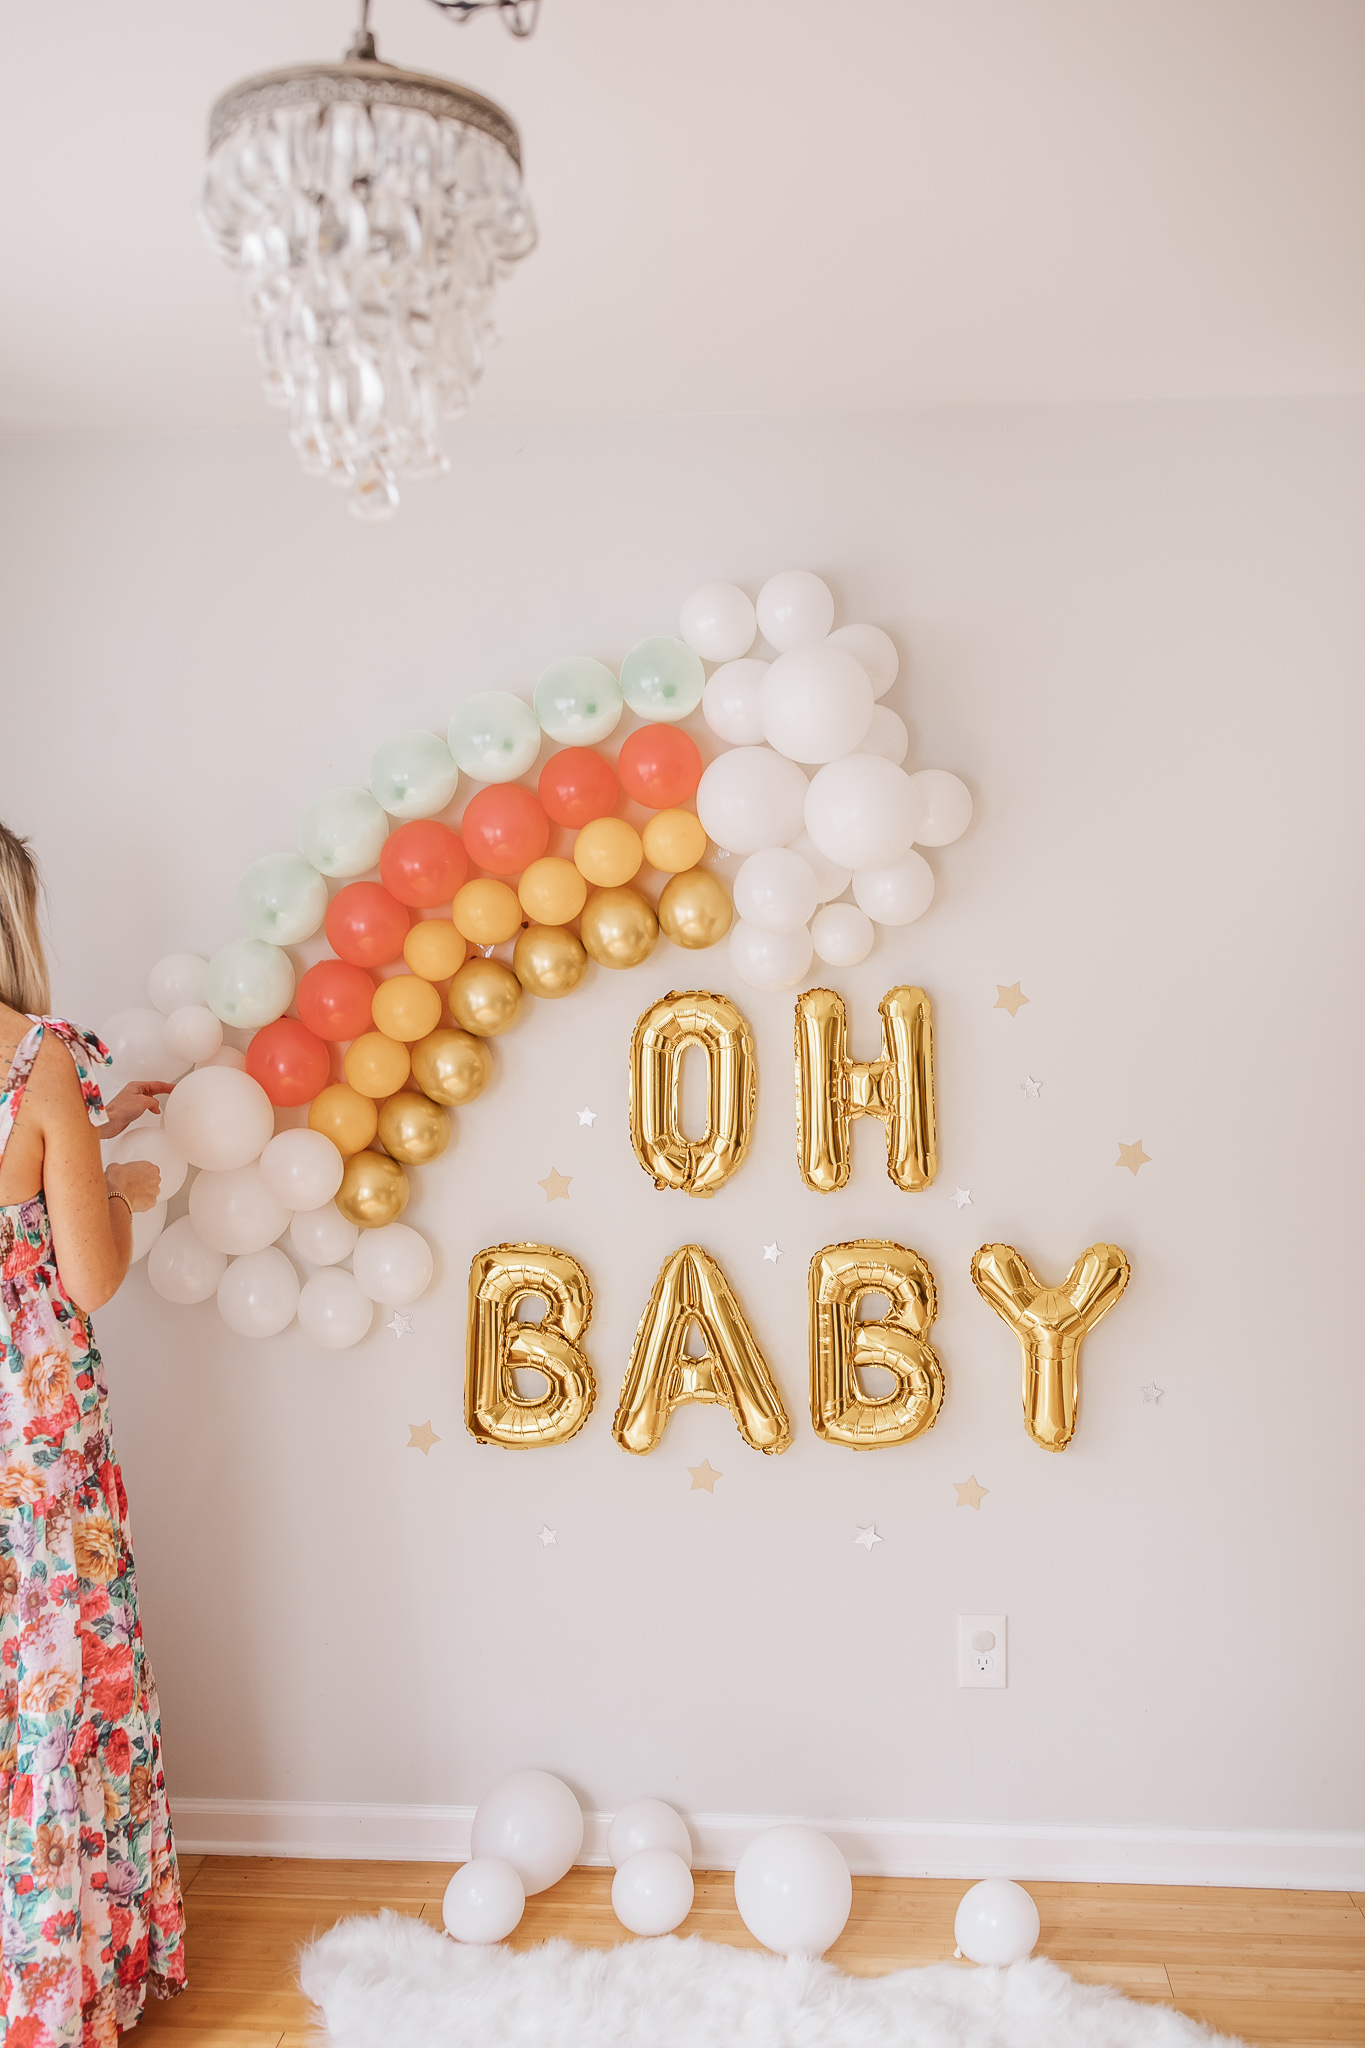
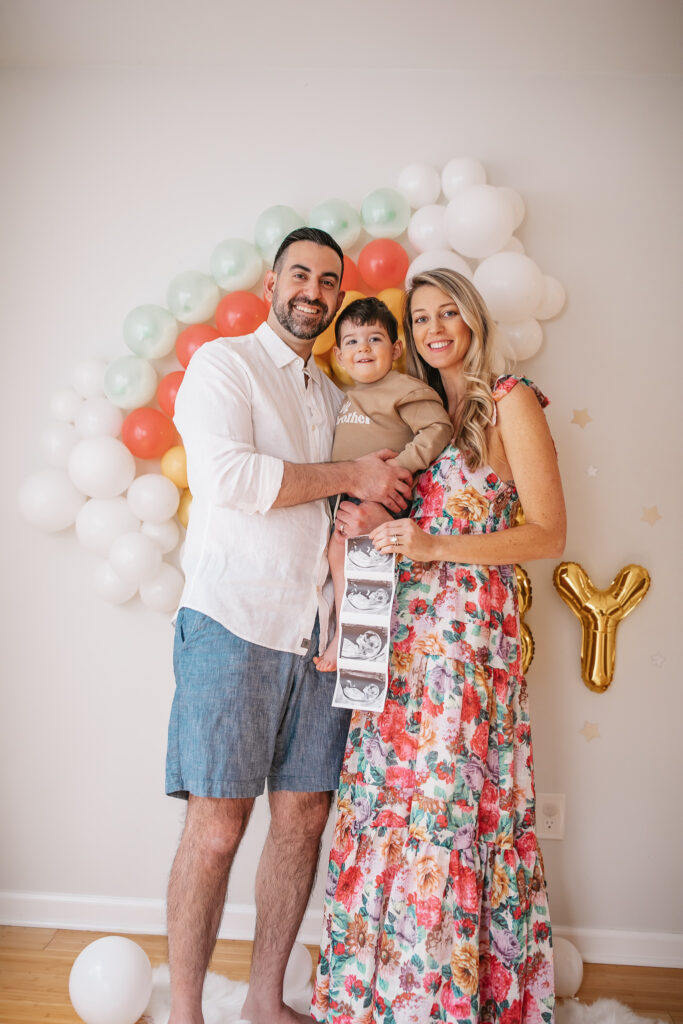
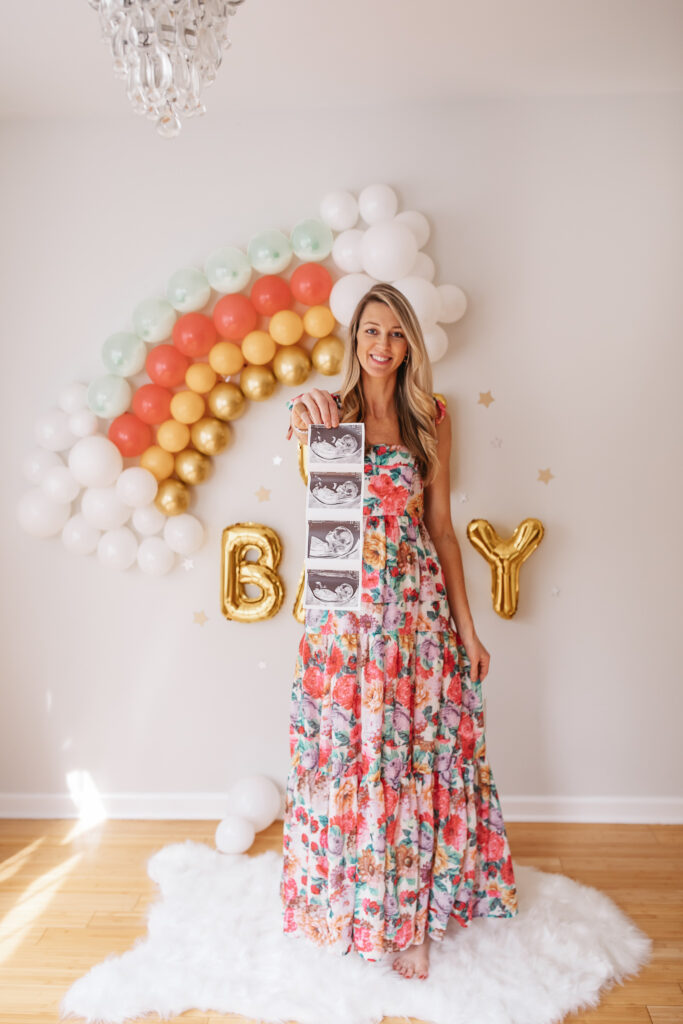
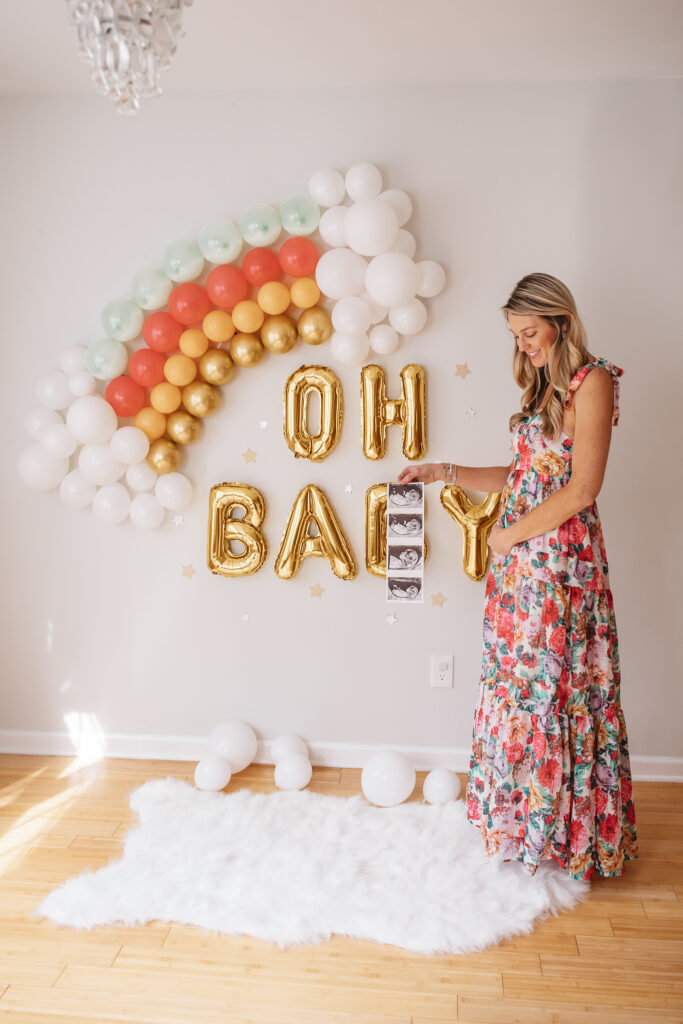
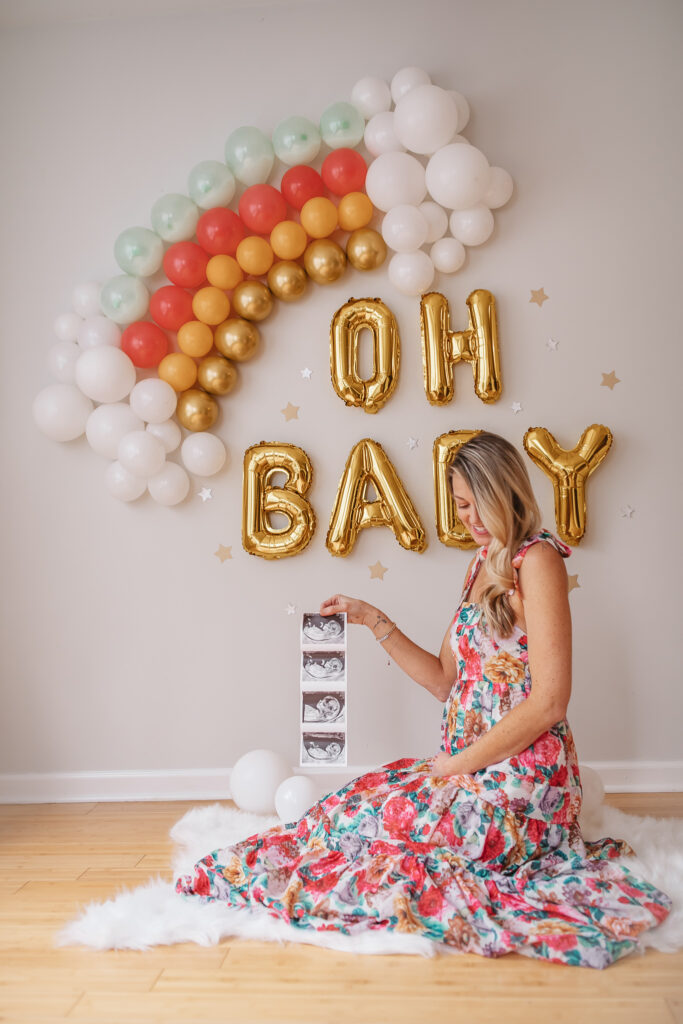
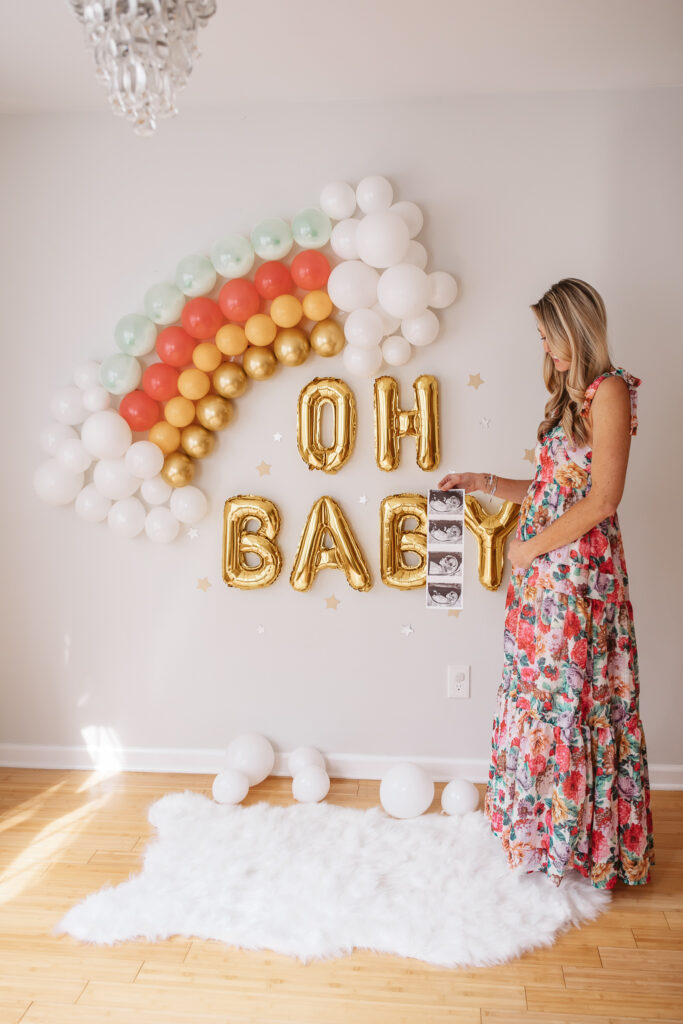
We were so excited to announce that we are expecting baby # 2 last weekend! I wanted to share all the details of our DIY Rainbow Baby Pregnancy Announcement here. I came up with this little rainbow balloon design for our pregnancy announcement a couple months ago, and I’m so happy with how it came together for our photos.
Below I linked our outfits and all of the supplies I used to set up our DIY pregnancy announcement {all from Amazon}. I also included some tips on how to create the balloon rainbow backdrop and clouds. I used this furry white rug to ground the photos a bit too which I think was a nice accent.
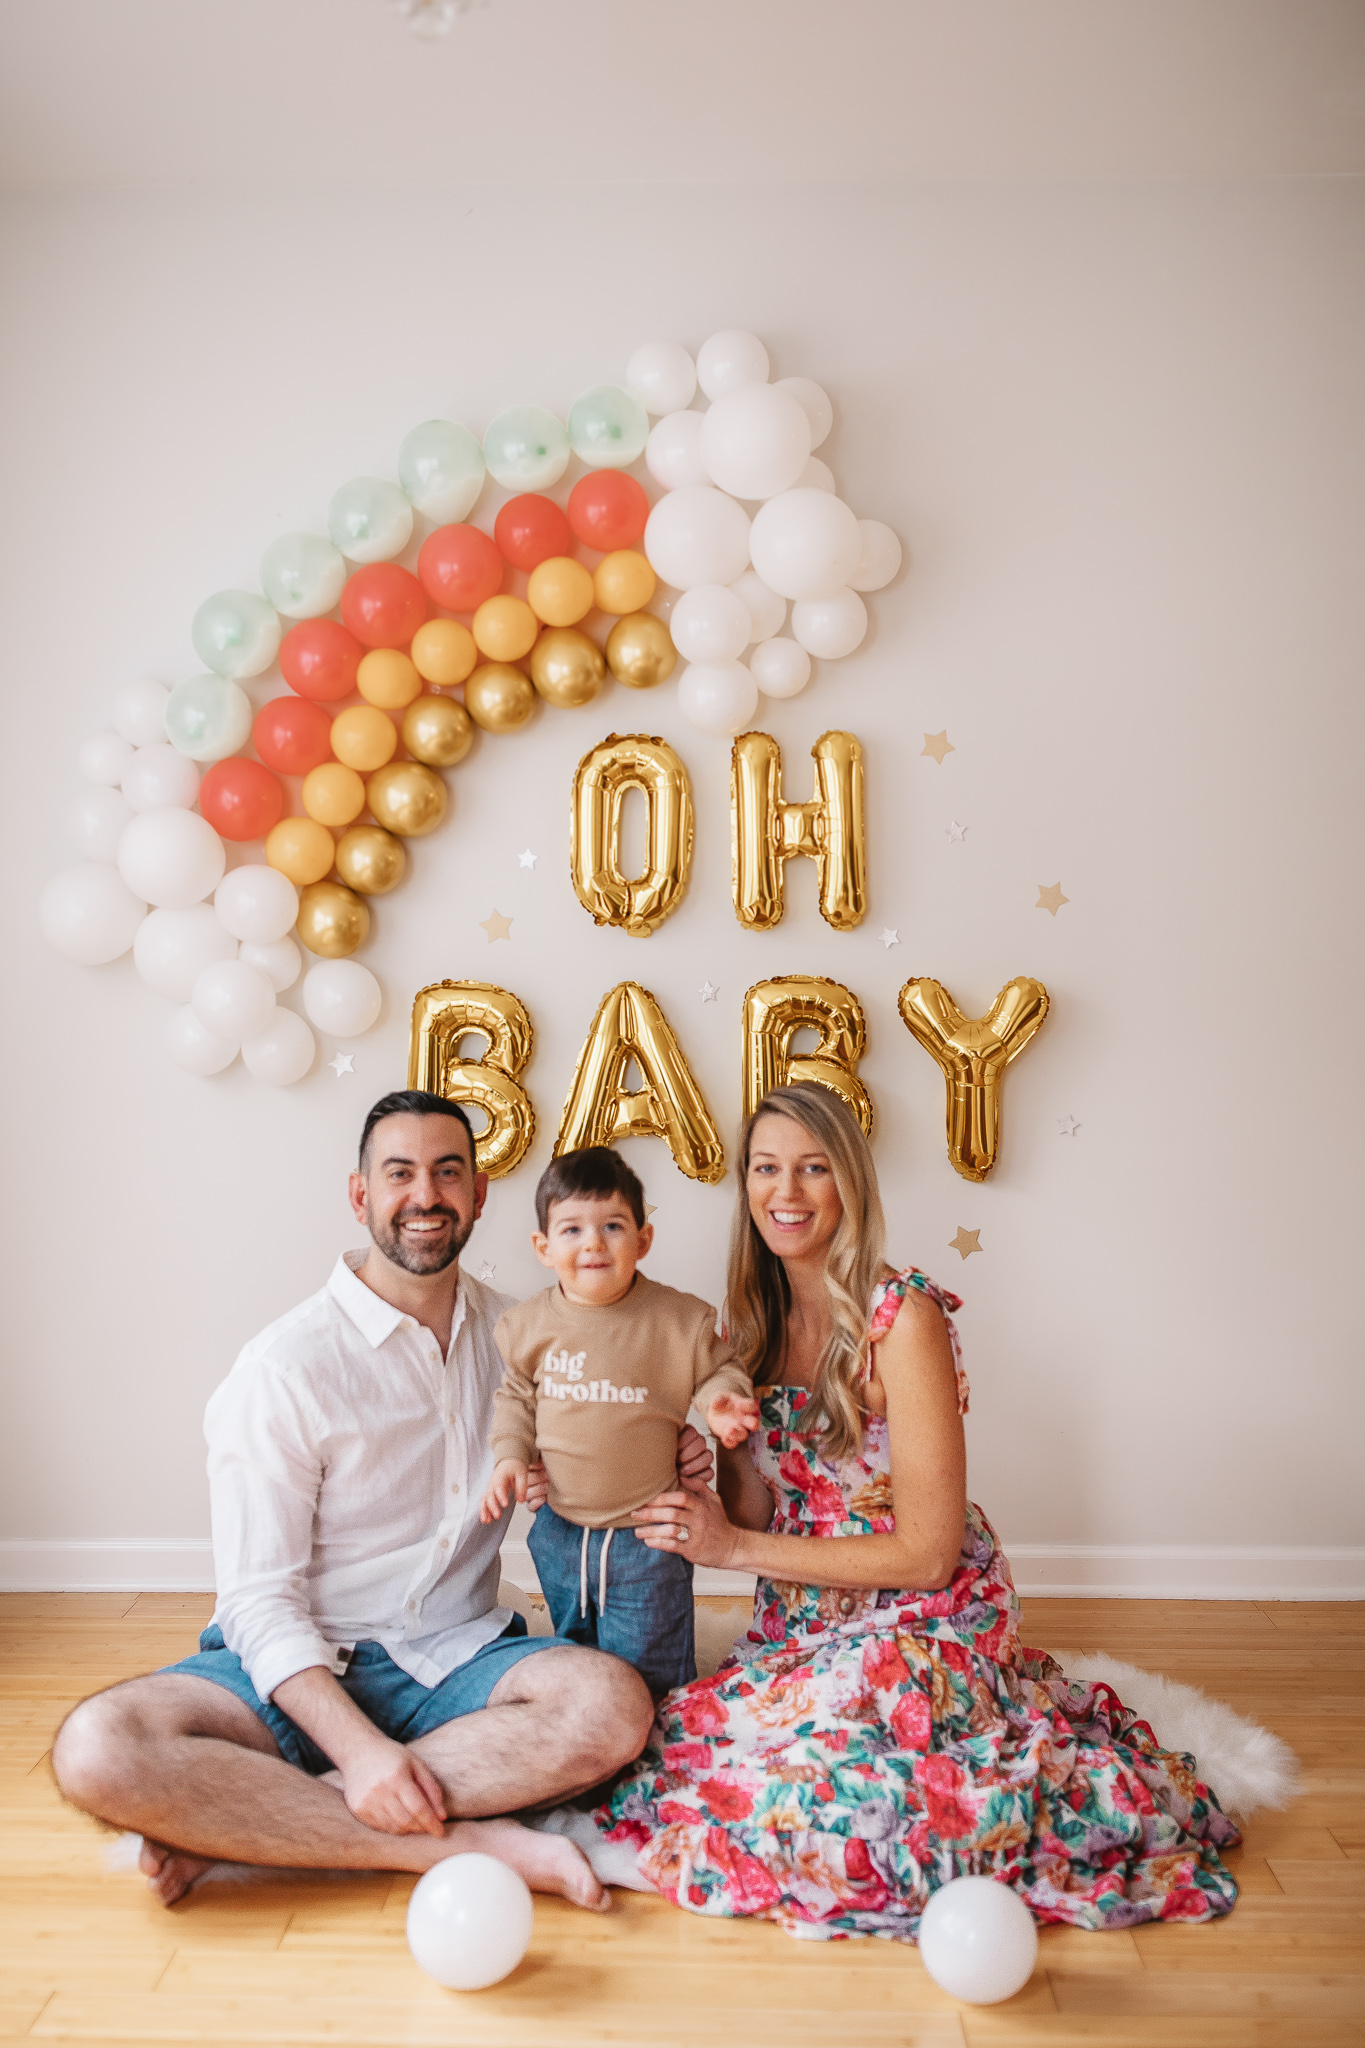
What We Wore for Our Rainbow Baby Pregnancy Announcement Photos
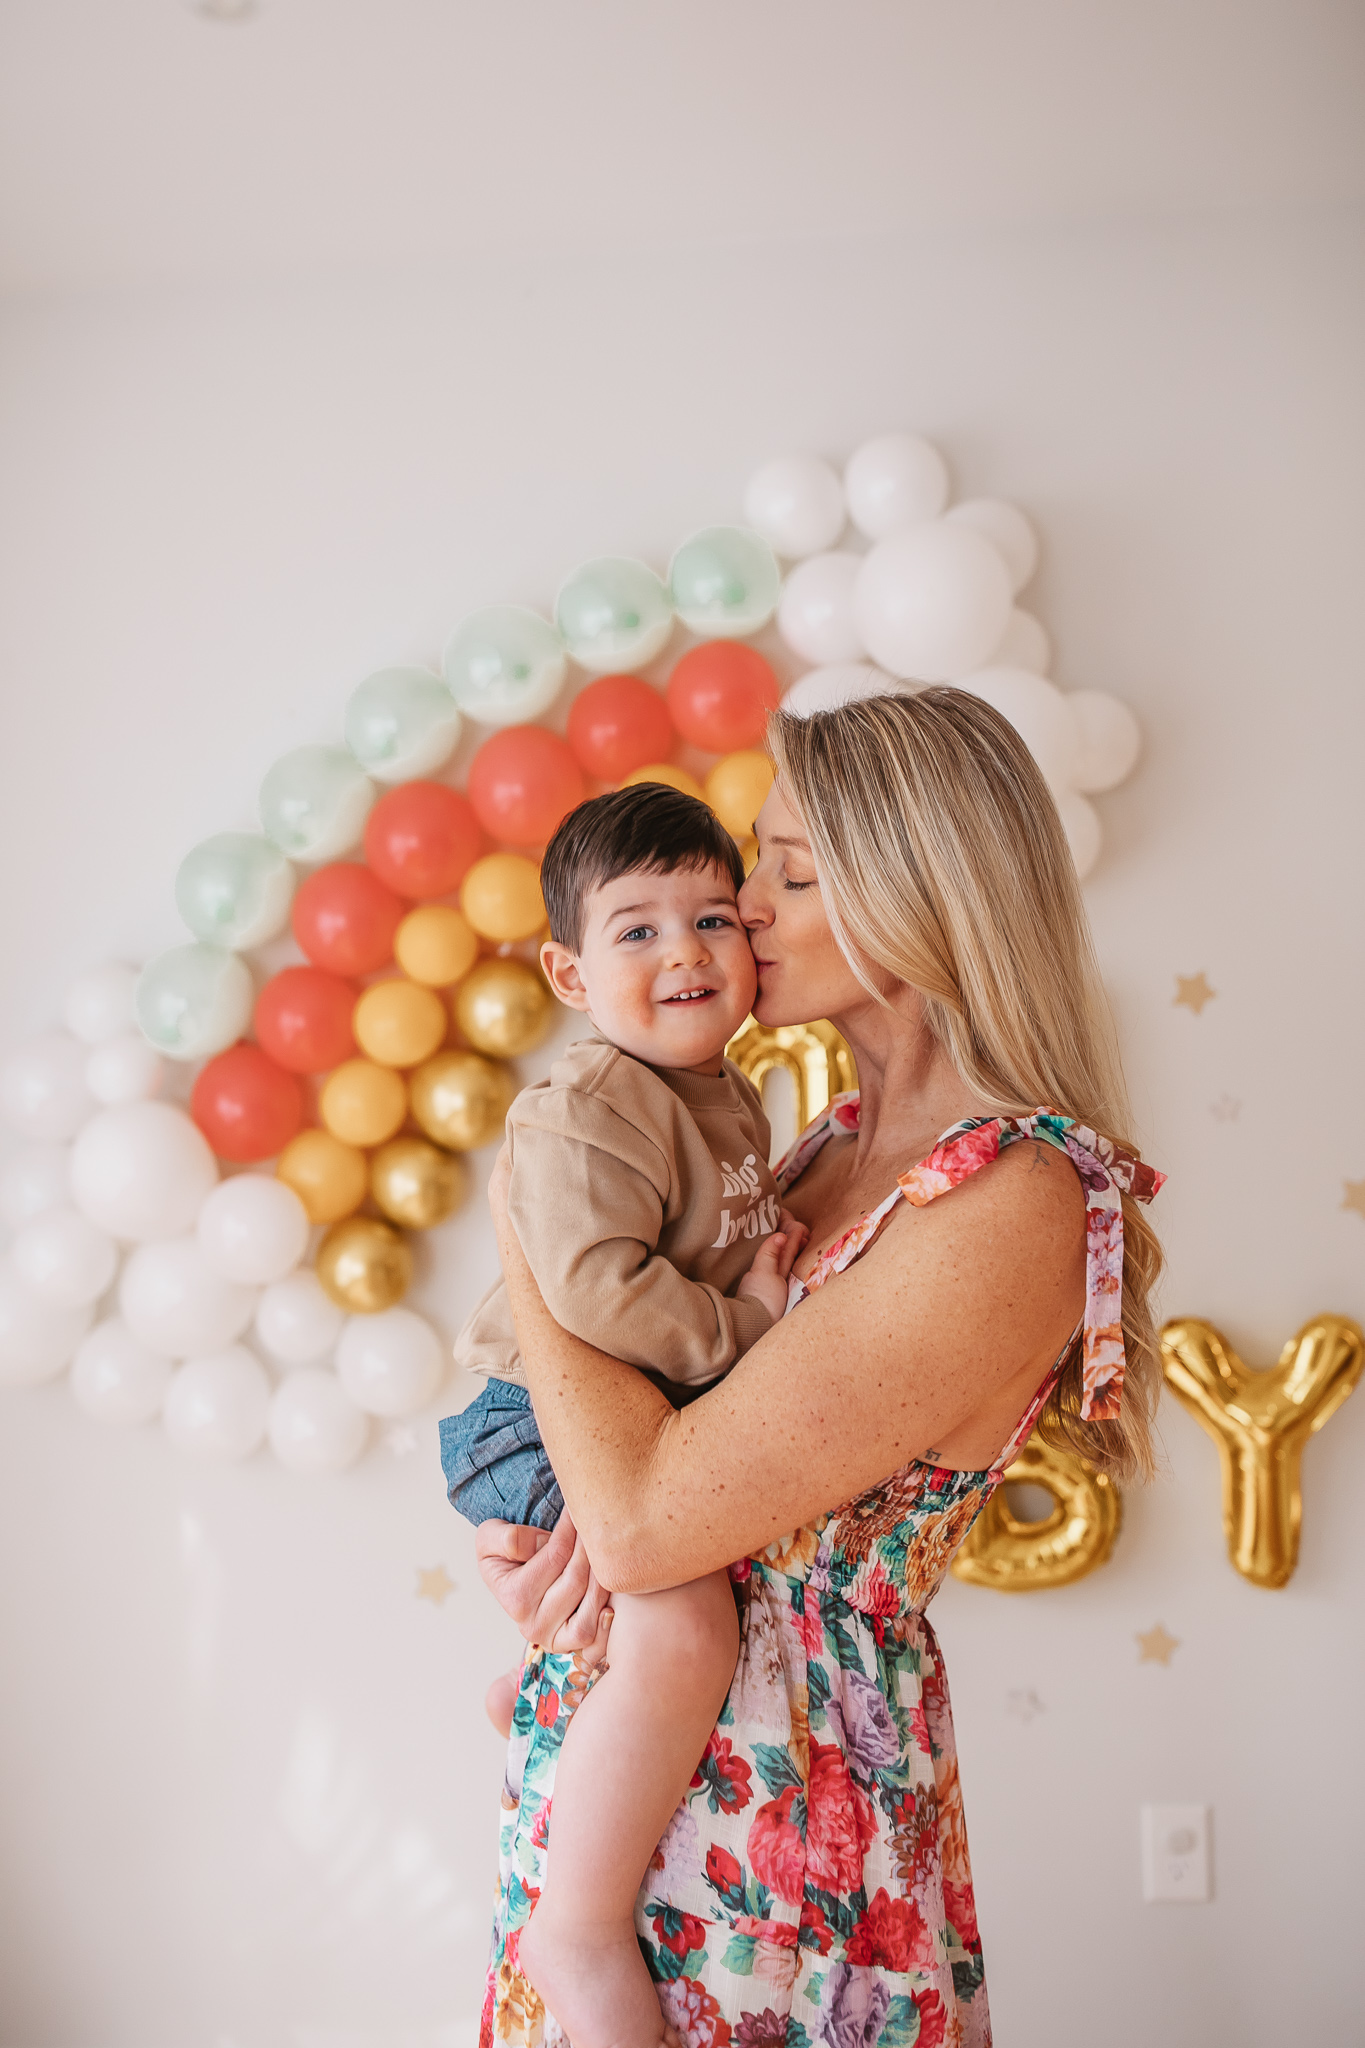
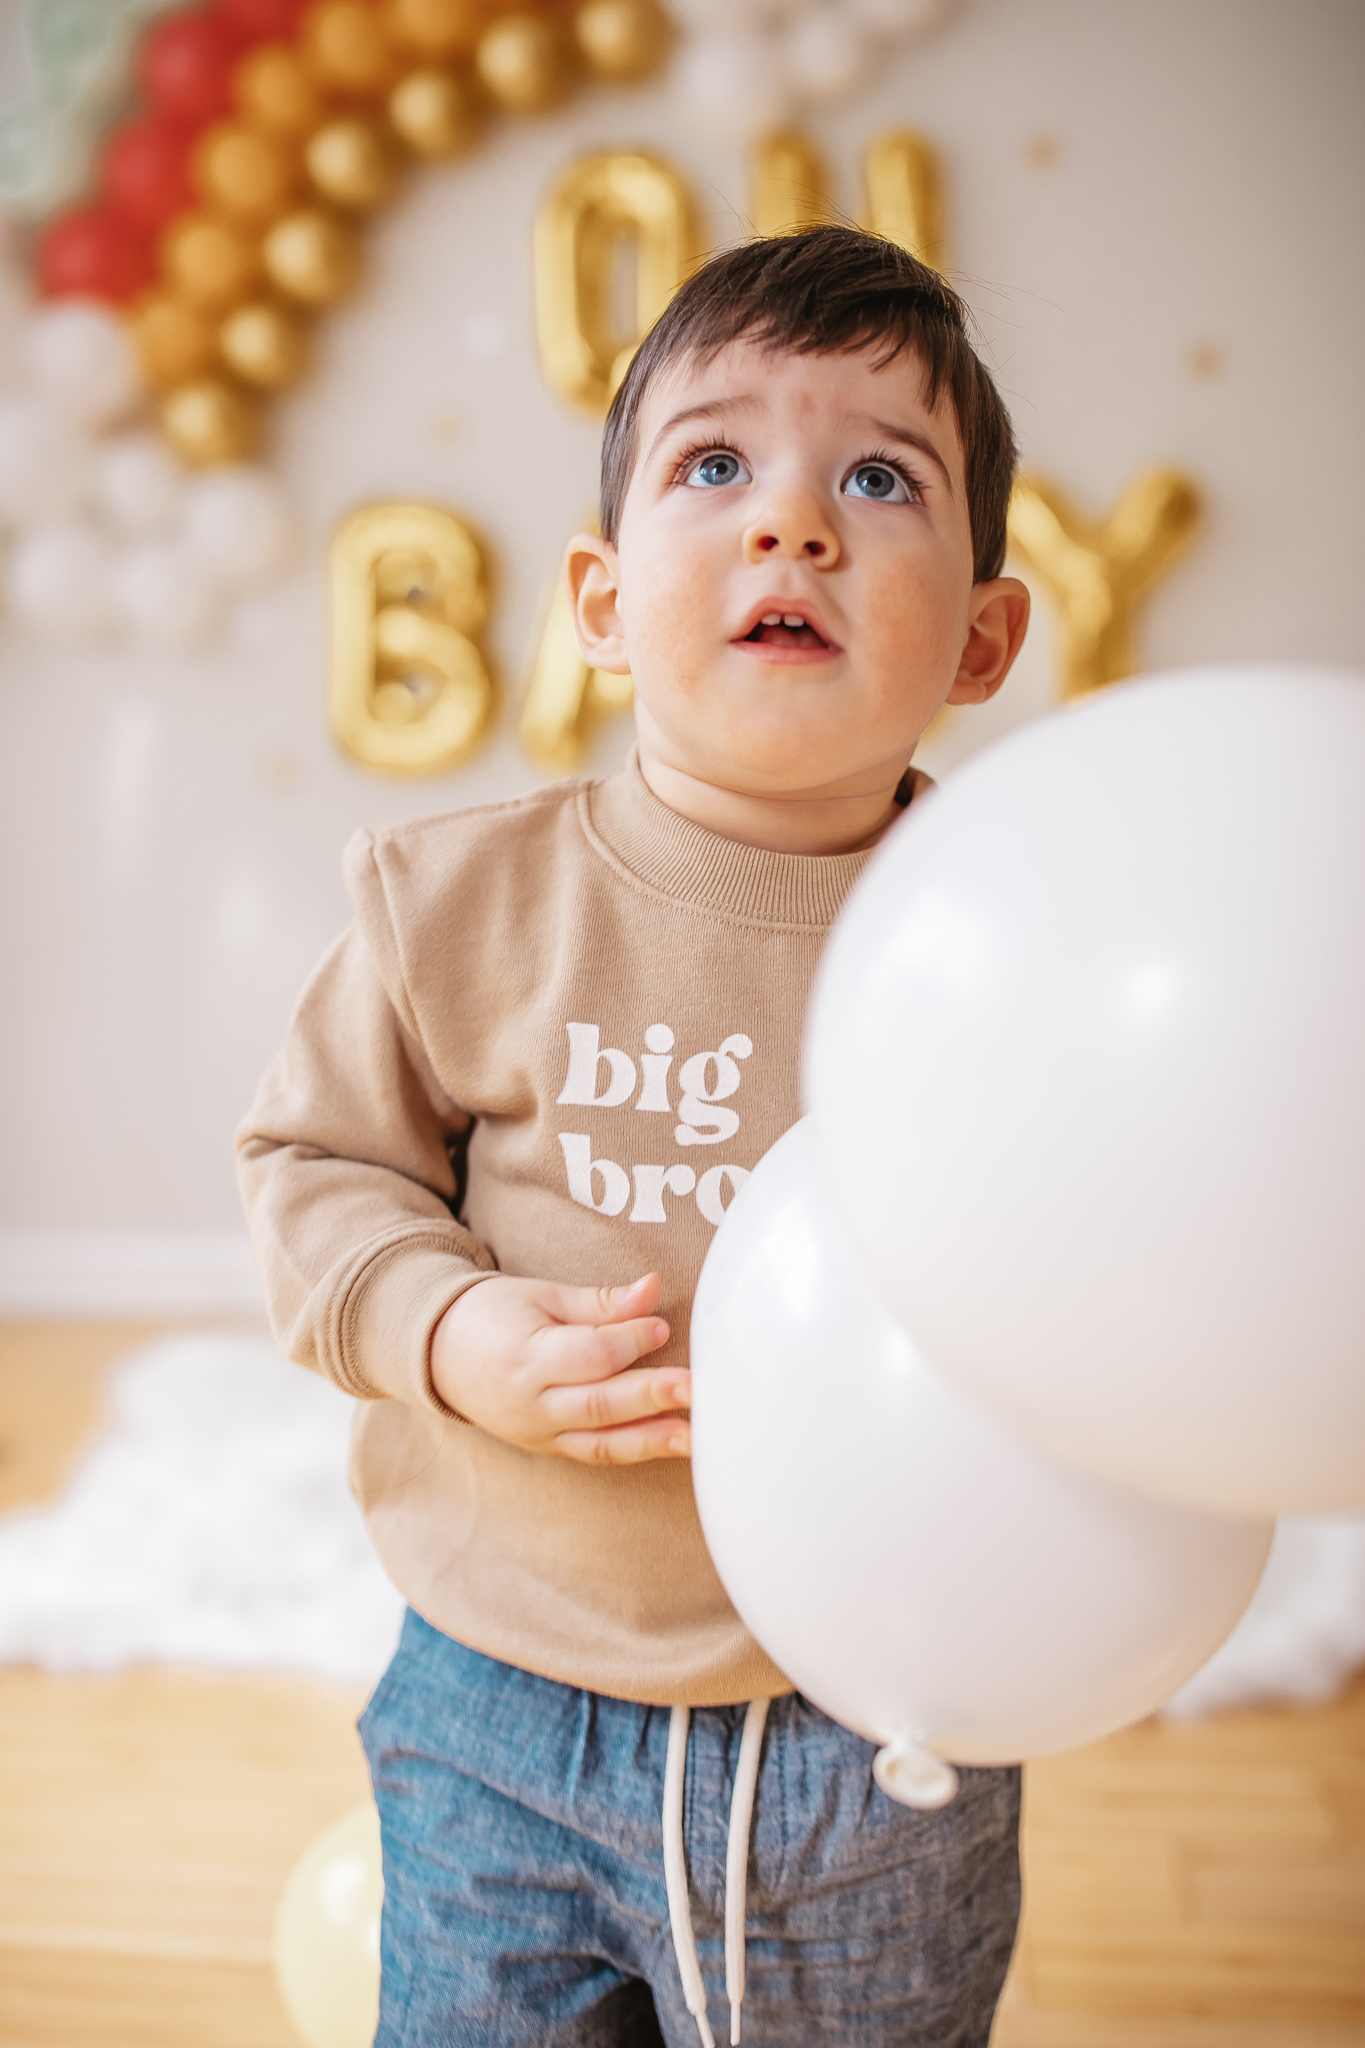
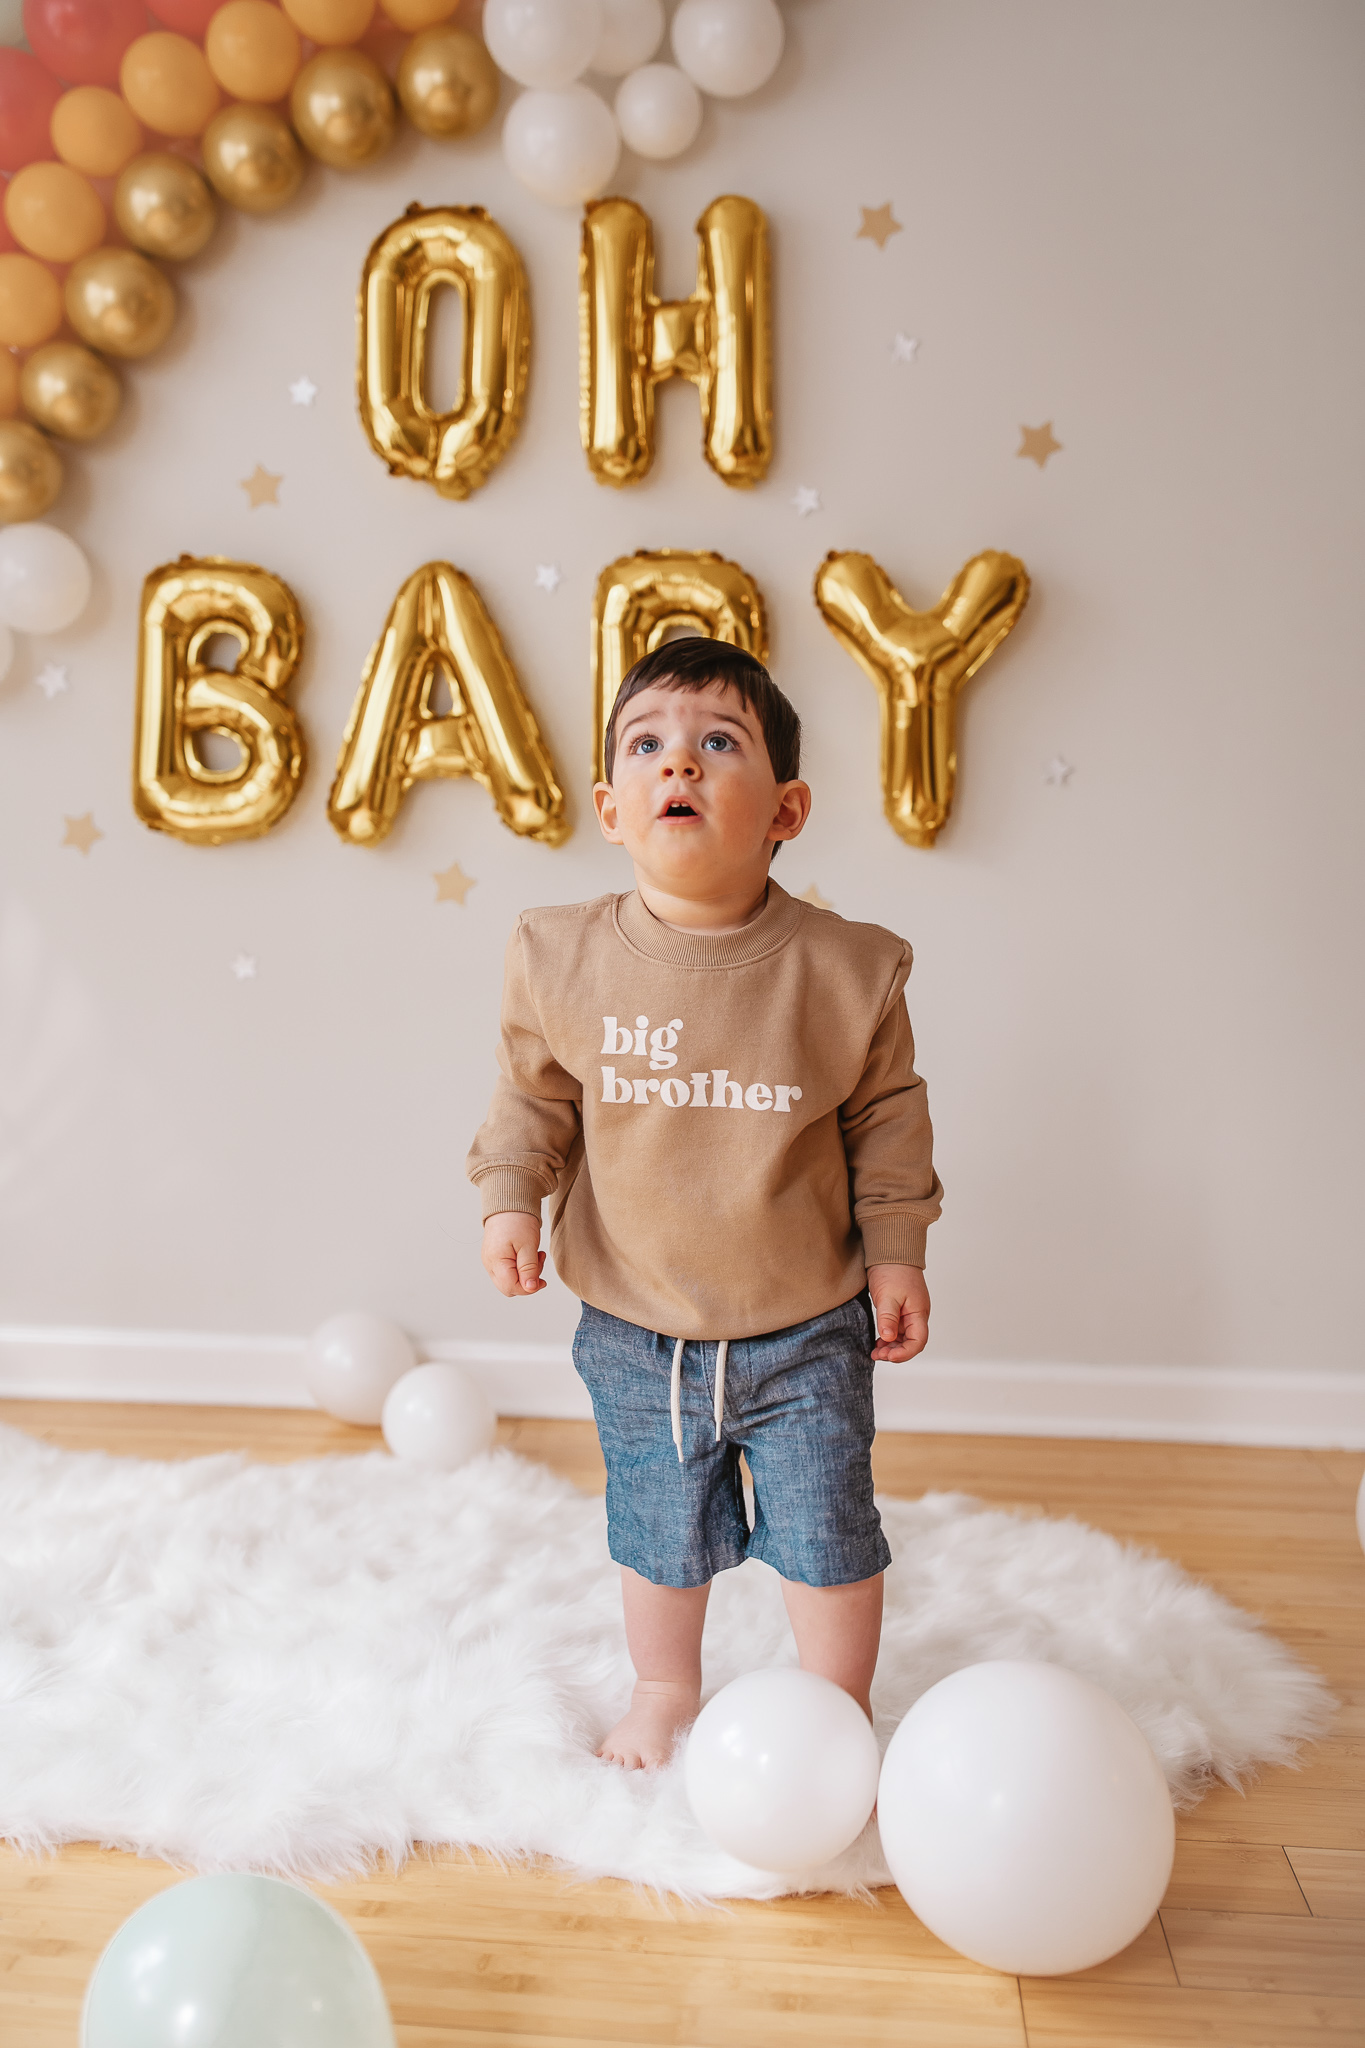
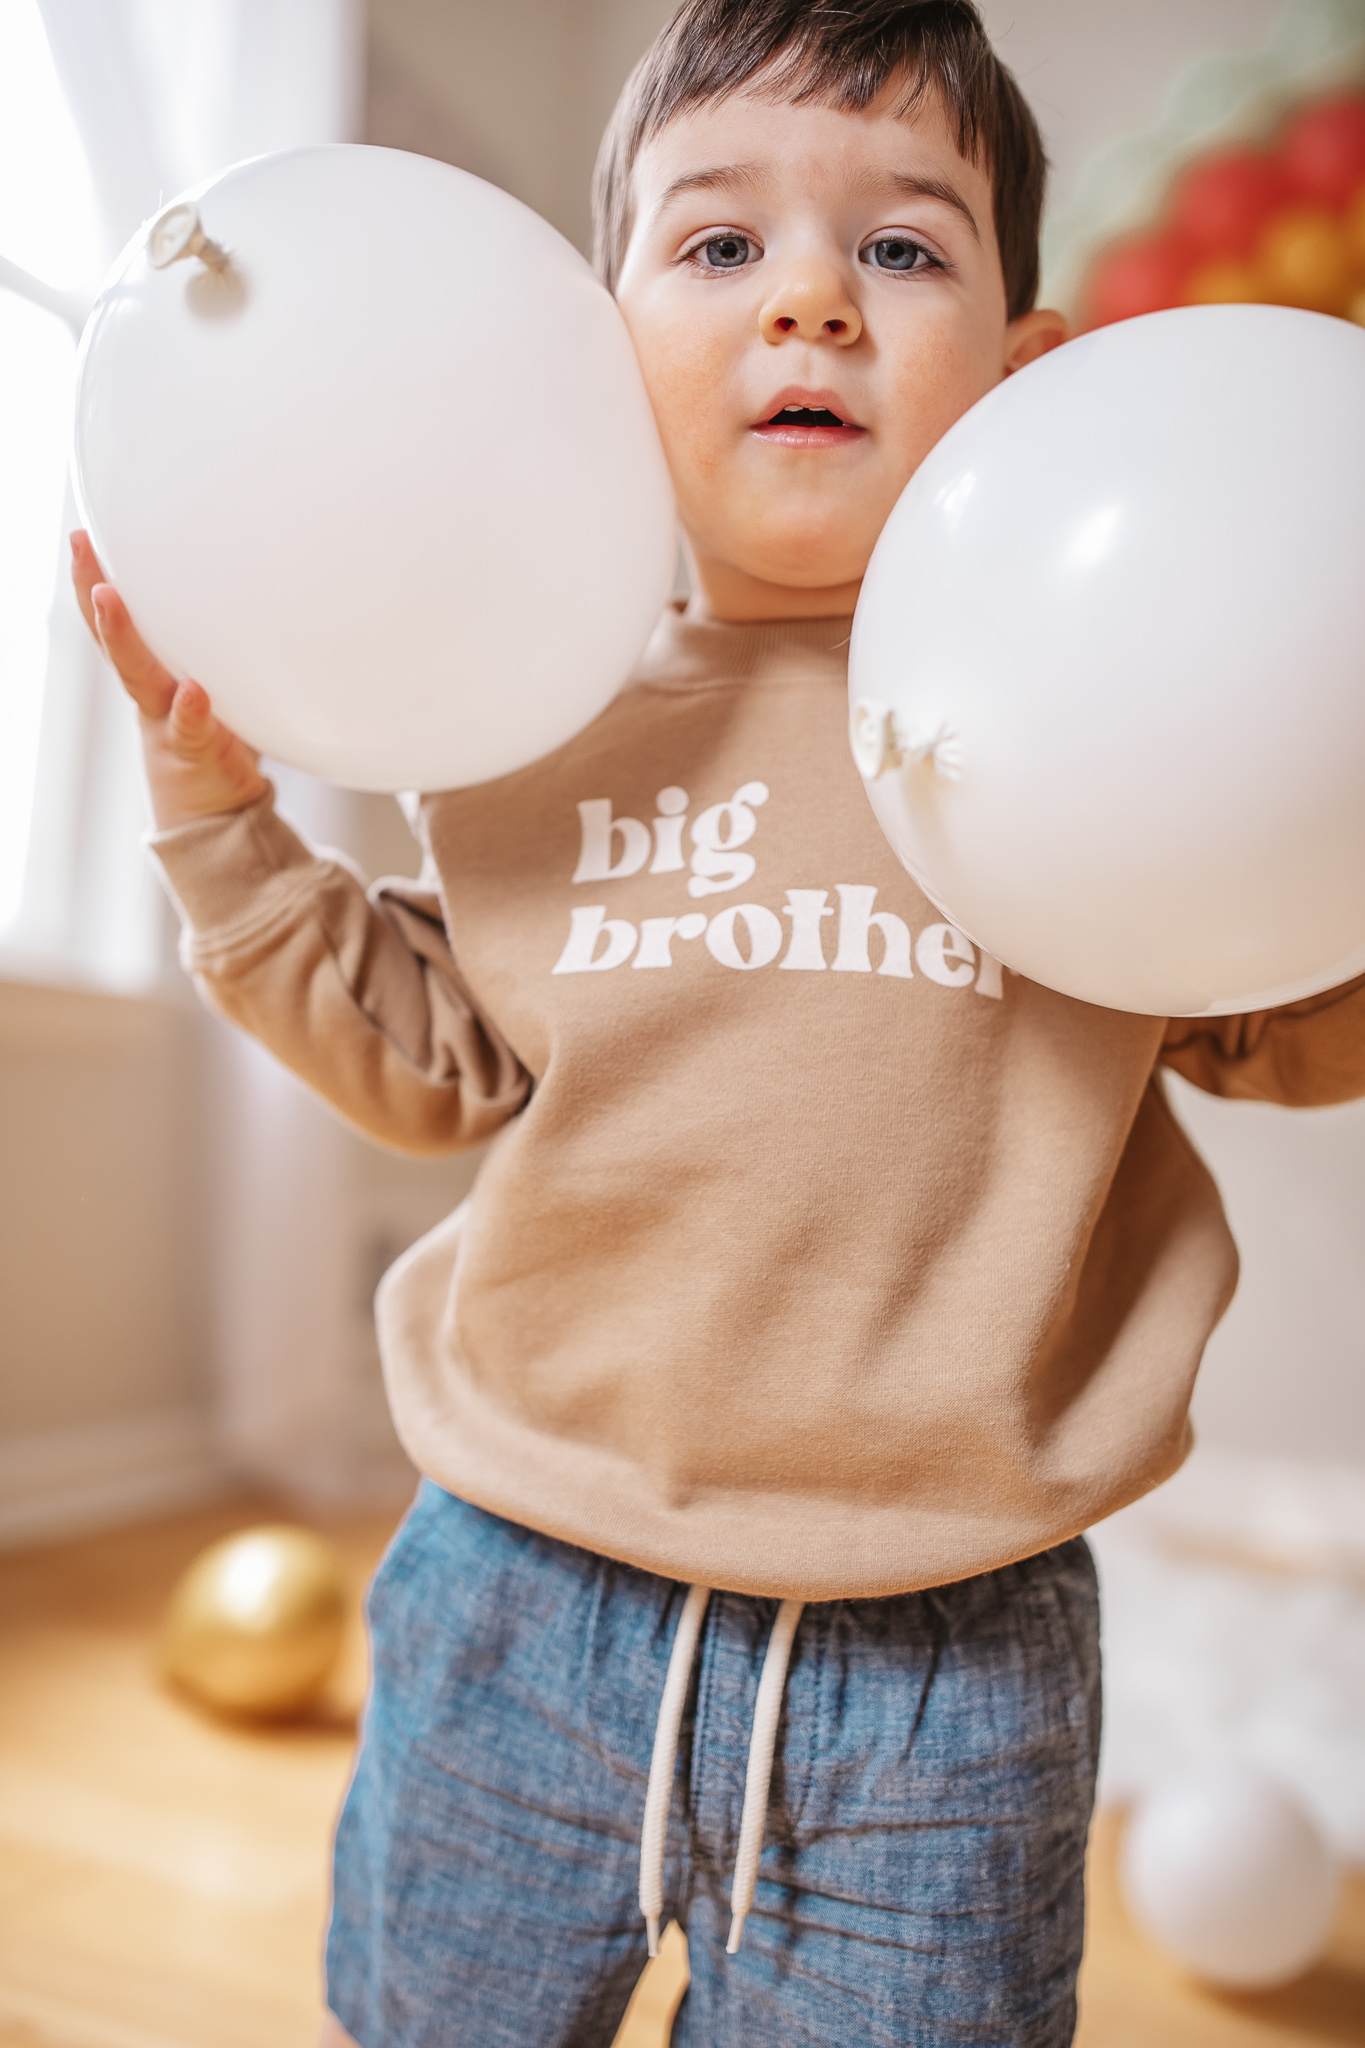
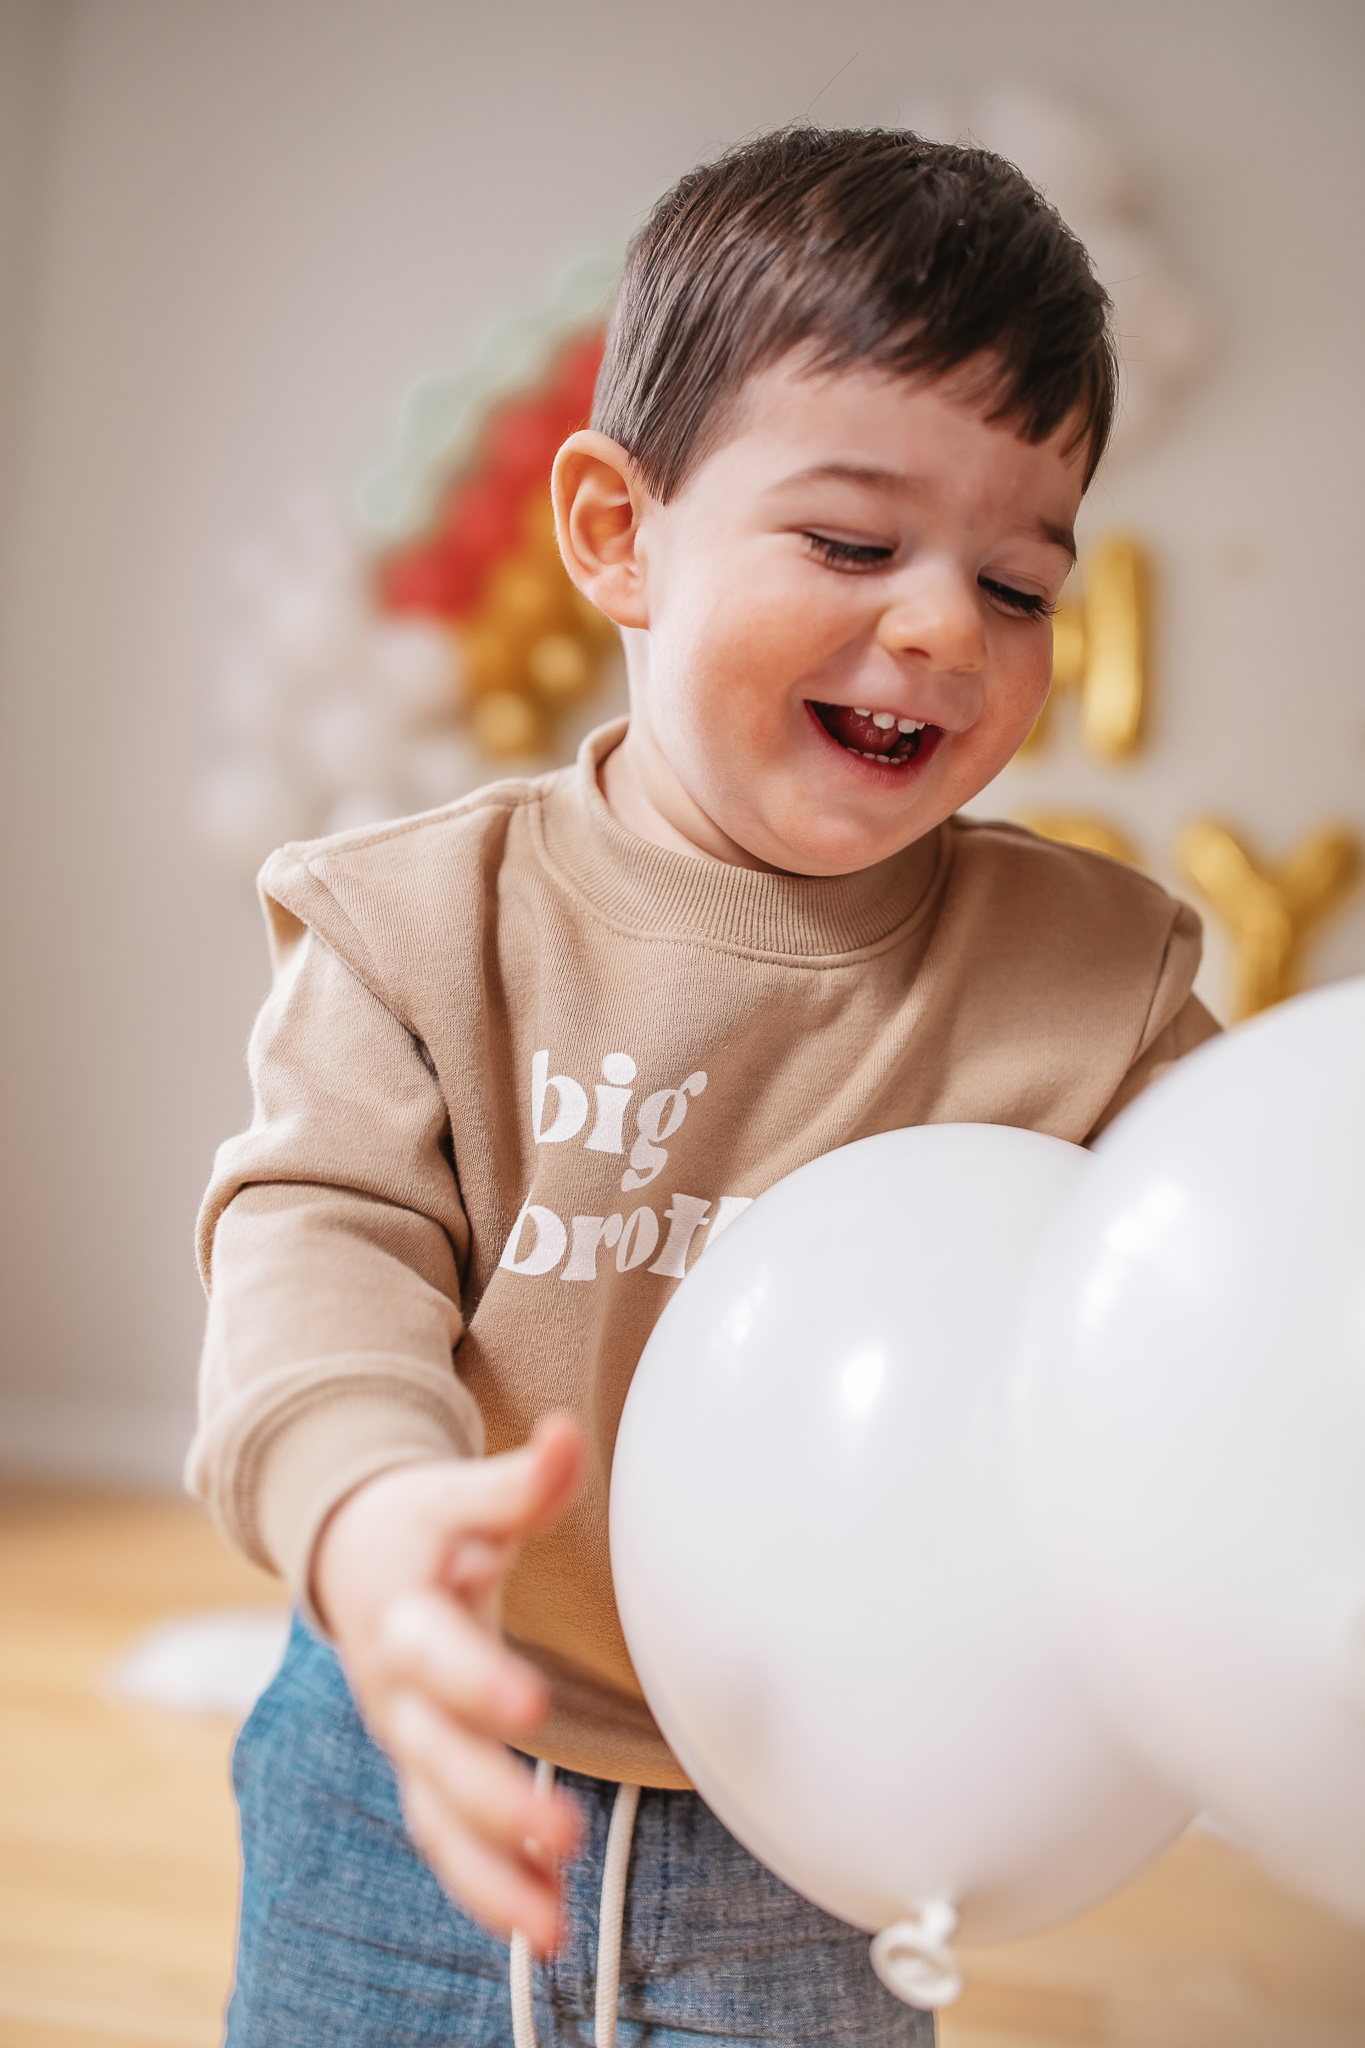
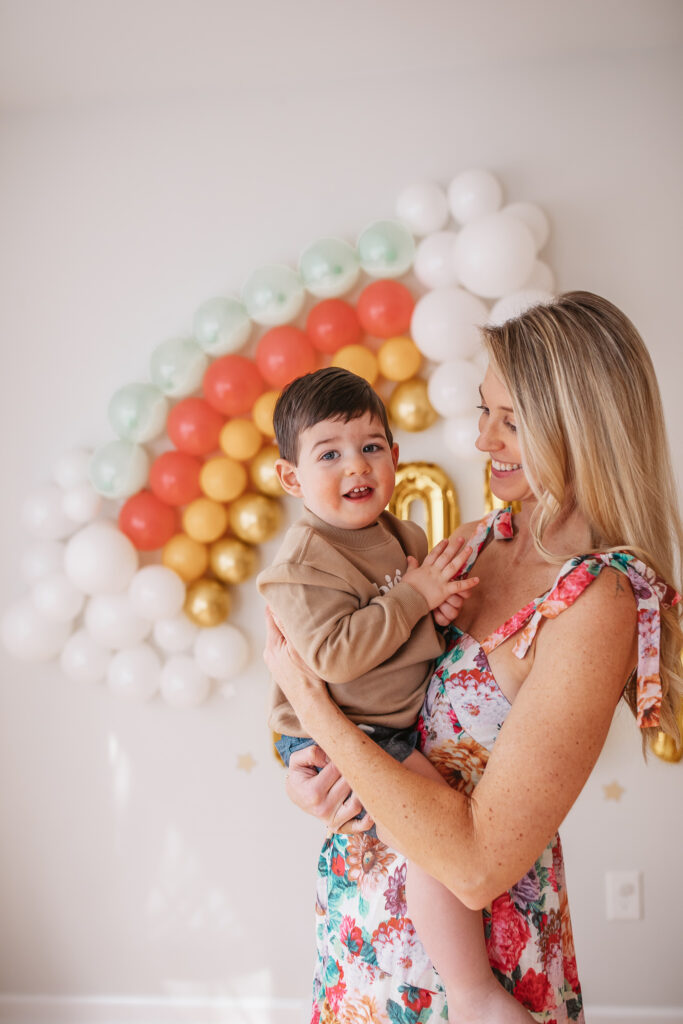
I got so lucky with this colorful floral maxi dress because the colors in it worked perfectly with the balloon colors I chose. Marc wore this white button down shirt and chambray shorts. And Luca wore these chambray shorts and big brother sweatshirt. I got the sweatshirt in a 3T so he could get the most wear out of it since he’s already wearing mostly 2T at only 18 months. It was a little big, but still cute. 🙂
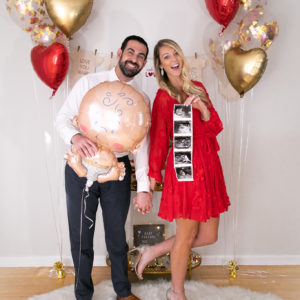
Check out our DIY Heart Themed Pregnancy Announcement when we were pregnant with Luca here!
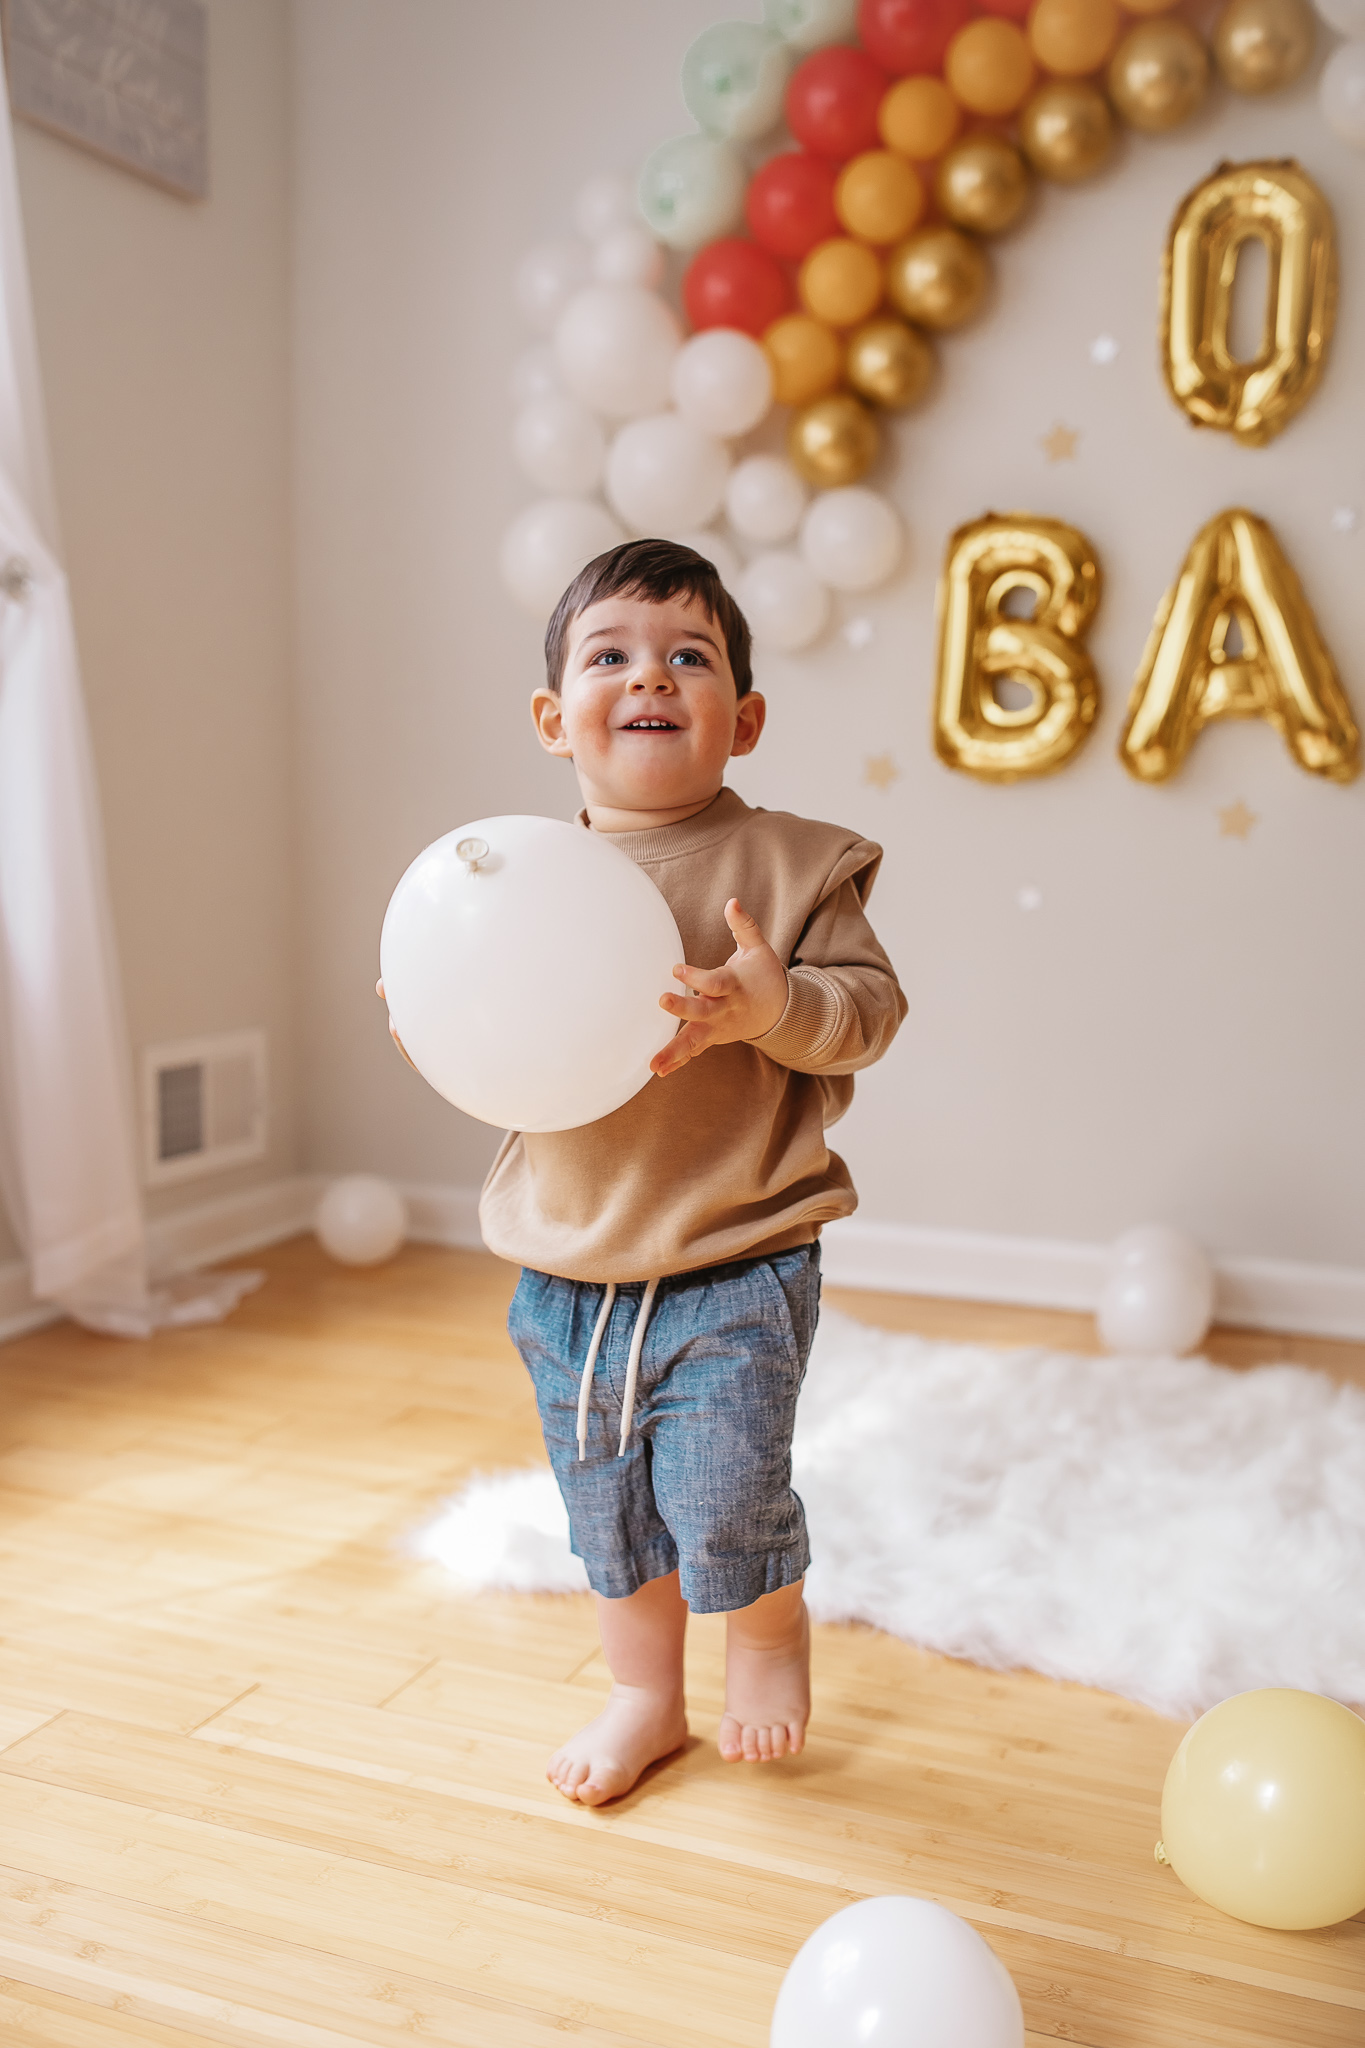
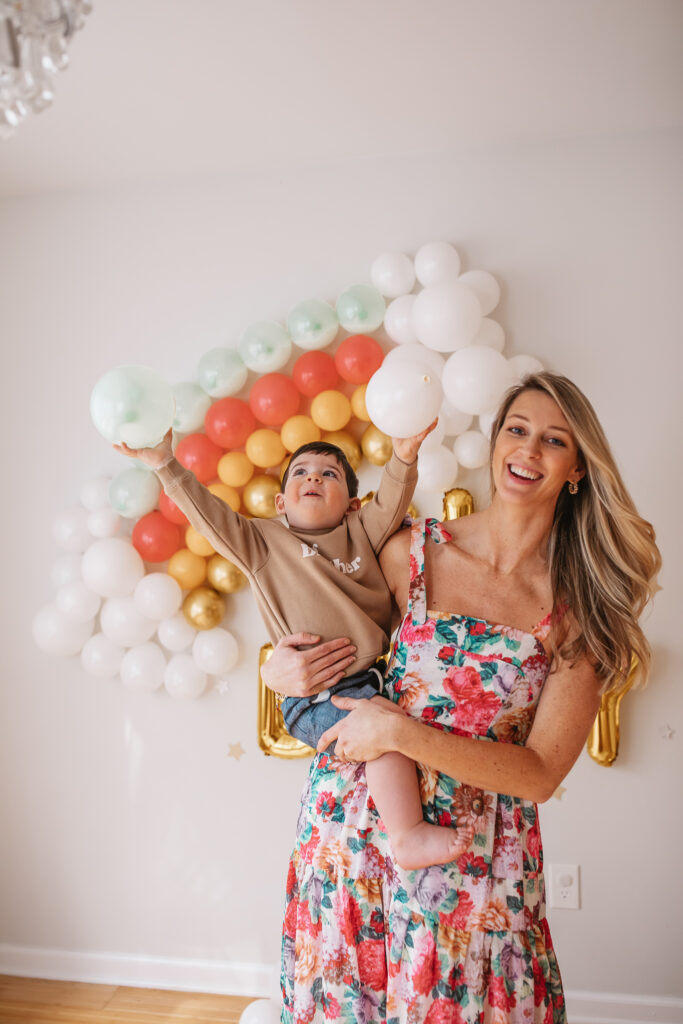
The rainbow balloon backdrop I created for our DIY rainbow baby pregnancy announcement would also be a great backdrop for a rainbow themed birthday party! Luca had so much fun playing with the balloons I left on the ground as decor too in case you couldn’t tell lol.
How to Create a Rainbow Balloon Backdrop
Supplies:
- White Small & Large Balloons
- Gold Small Balloons
- Lemon Yellow Small Balloons
- Pink & Mint Small Balloons {purchased this multicolor pack for these two colors}
- Gold Stars
- Silver Stars
- OH BABY Balloons
- Clear Packing Tape
- Glue Dots & Balloon Garland String {these come in the pack with the balloons I linked above!}
Instructions:
- Decide how high you want your backdrop {will you be putting a high chair in front of it, standing, sitting below it etc}.
- Inflate the OH BABY balloons and place them on your wall. I always use rolled up pieced of clear packing tape for this. It works great and doesn’t damage the walls or balloons.
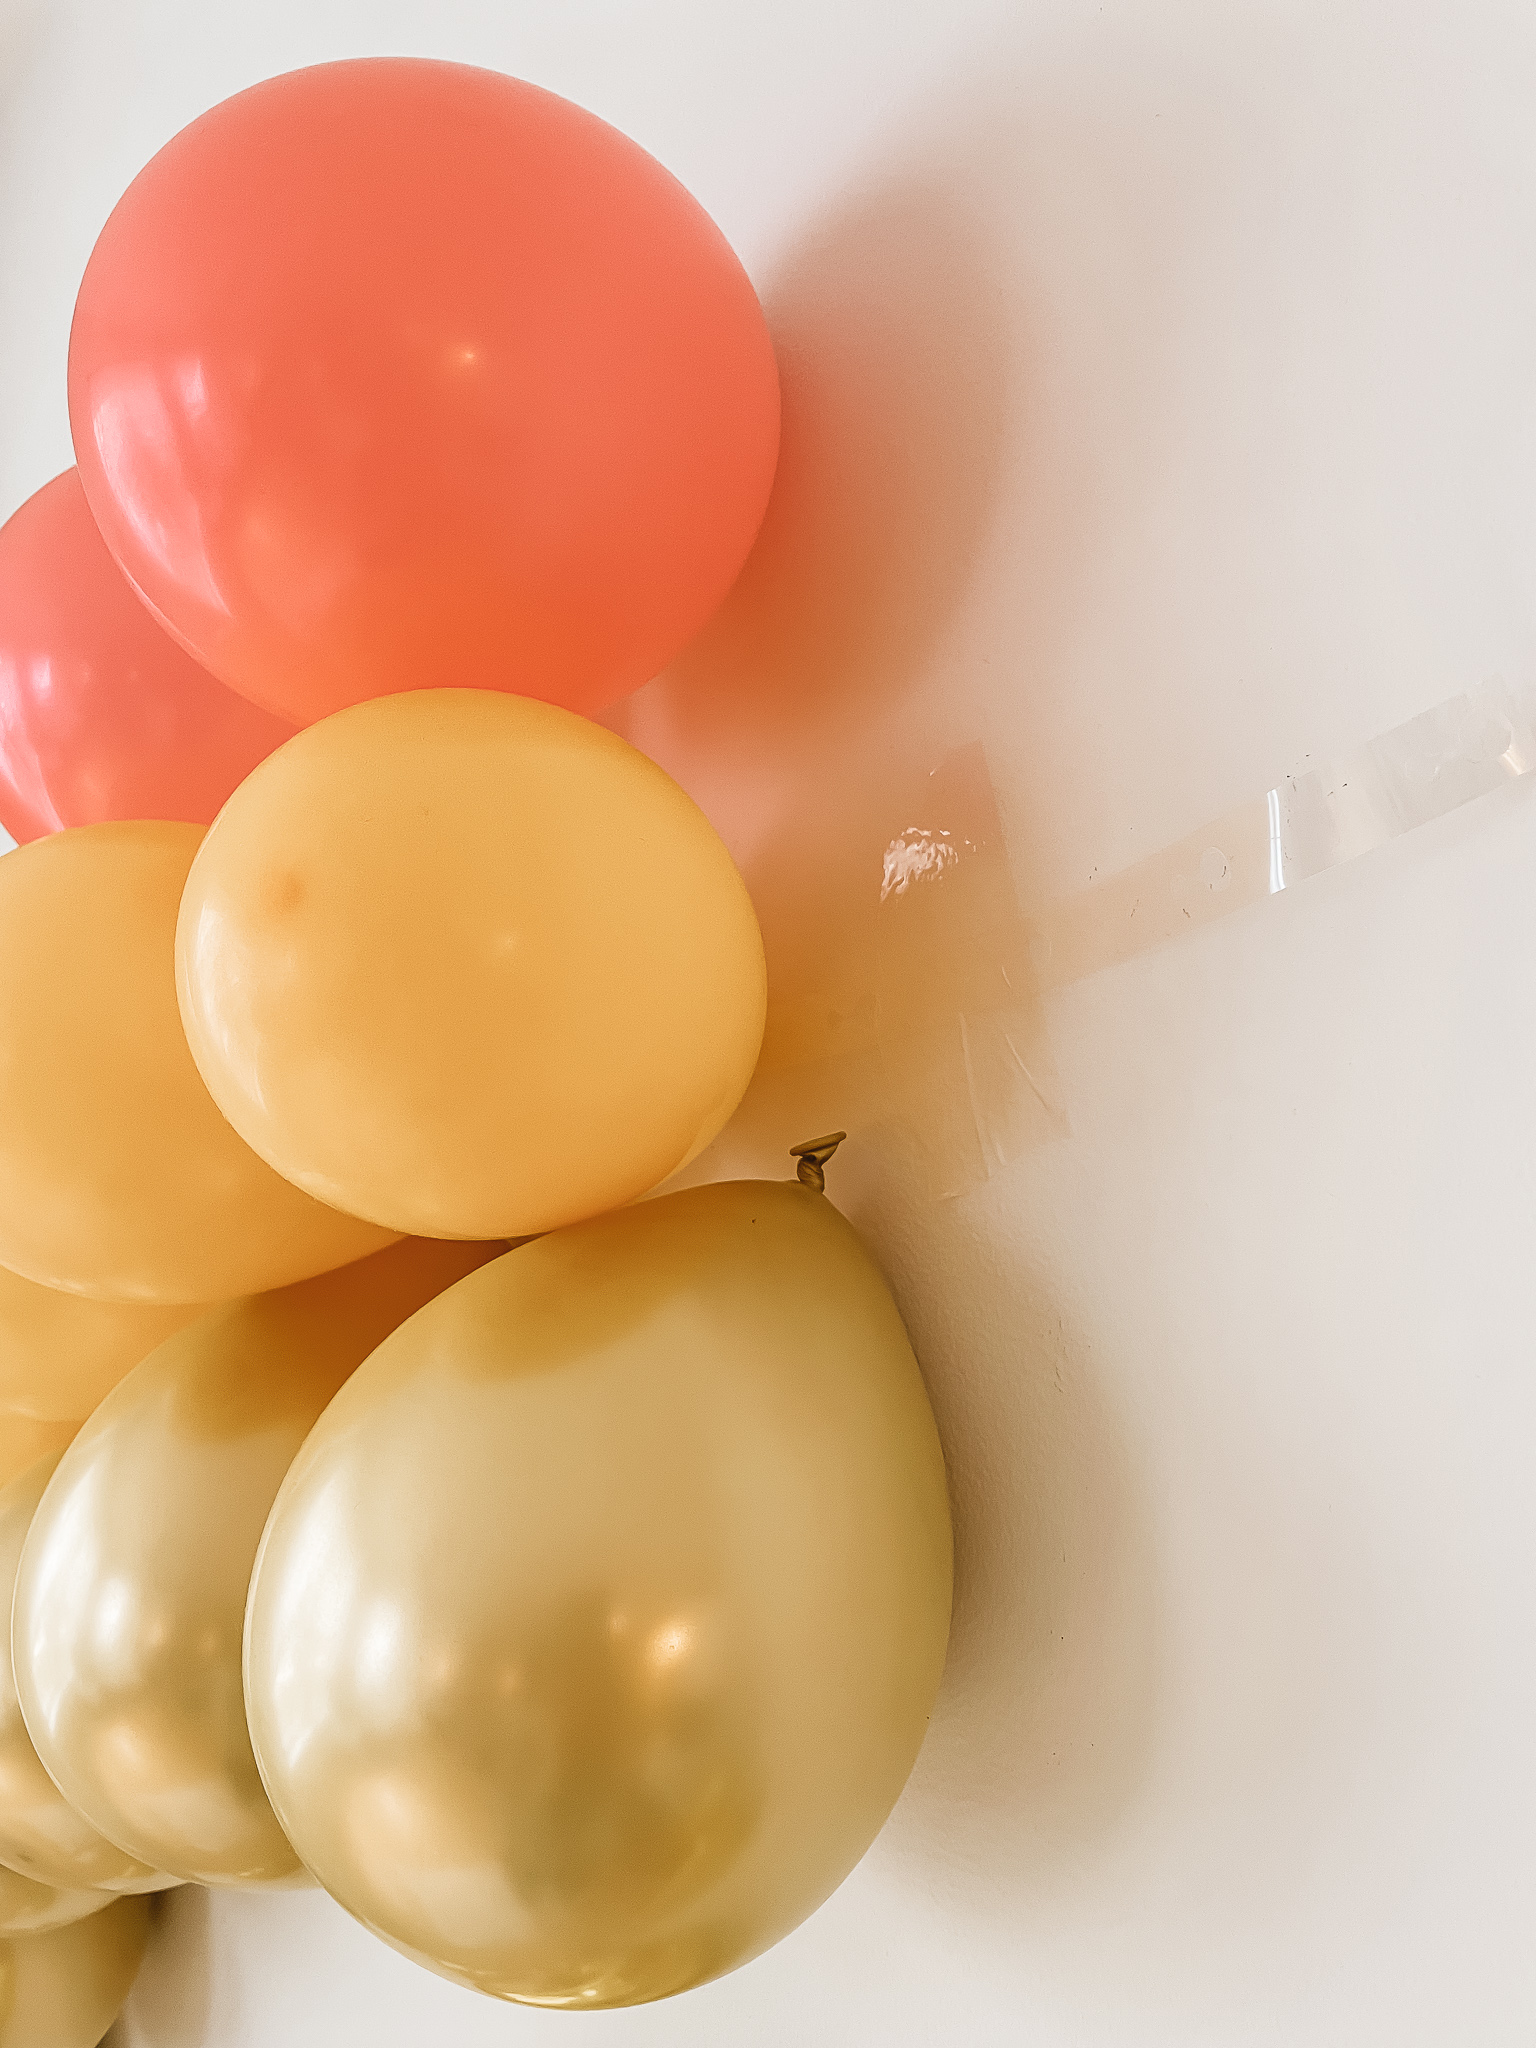
- Blow up the colored balloons. I used between 7-8 of each of the rainbow colors and inflated them slightly bigger for each row up {the gold being the smallest}. For the white balloons, we inflated both the big and small ones at varying sizes so there was good dimension to the clouds.
- Start placing the bottom row of the rainbow. I used glue dots to stick all of the balloons to the wall and it worked great. Use two glue dots on each balloon if you need. Place them as close to the balloon tie as you can but still a couple inches away {so that the tie doesn’t press them off the wall and keep them from sticking}. This will make sure that the top of the balloon is what faces outwards for the best look. I also used the glue dots in between some of the balloons if they weren’t staying in a good row, but once you place the other rows and the clouds it will help them all align too.
- Place the other rows above using the same method.
- **Alternatively, if you are having trouble getting the balloons to stay, you can use the balloon garland string. I did this for the yellow row to get them closer to the gold – see photo below. Place the balloons in the slots on the garland, and then use packing tape to stick the string to the wall. Don’t worry if the packing tape shows at the end because your clouds will cover it. I will say, this is not as easy in my opinion which is why I went back to the glue dots for the rest of the rows.**
- For the clouds, I do recommend using the balloon garland string because it will help you make nice clusters. Place about 7 or 8 balloons of varying sized through the slots in the balloon garland string and then cluster it up. Use packing tape to adhere it to the wall at the end of the rainbow.
- Use glue dots on more white balloons of varying sizes to fill in and expand the clouds in a way you like.
- Repeat at the other end of the rainbow.
- Use glue dots to place the stars randomly around your backdrop.
- I used a furry white rug on the ground and also placed some random white balloons around on the floor.
- Voila! Your DIY Rainbow Balloon Backdrop is complete!
If you want to take family pictures in front of your rainbow balloon backdrop using a tripod and have a DSLR camera, I highly recommend using an intervalometer like this one from Amazon. We used to use a bluetooth remote, but it was super unreliable and stressful to make sure it lined up and to get the remote hidden in time for the photo each click. I have a Canon 5D Mark IV and only the wired intervalometer from this link works with this camera. It plugs in to a slot on the front of the camera. Feel free to comment below or DM me on instagram @sunseekinginstyle with any questions on this!
 We’re Having a Baby! All the Details of our Pregnancy Announcement
 Gluten-Free Pumpkin Spice Cream Cheese Cookies
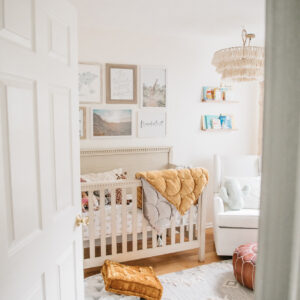 Wanderlust Baby Nursery Unveil
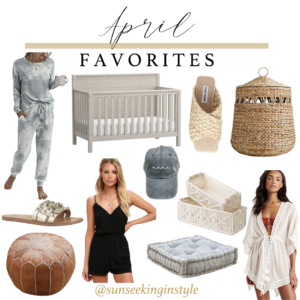 April Top Sellers


[…] all the details of our DIY Rainbow Baby Pregnancy Announcement here […]